บทความนี้จะเป็นขั้นตอนการใส่กระดูกสำหรับโมเดล 3 มิติด้วย Blender ผ่าน Add-on ที่ชื่อว่า Rigify ที่สามารถใส่กระดูกได้รวดเร็ว แบบ Automatics-weight อัตโนมัติไว้ใช้กับงานเกม
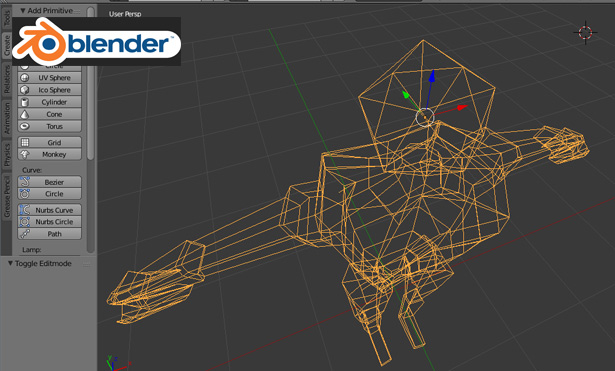
เปิดโปรแกรม Blender ขึ้นมาได้เลยครับ ศึกษาการปั้น และการใช้งานแบบ Quick Step ได้ที่
- Quick Step: การใช้งาน Blender สำหรับขึ้นโมเดล 3 มิติสำหรับเกม
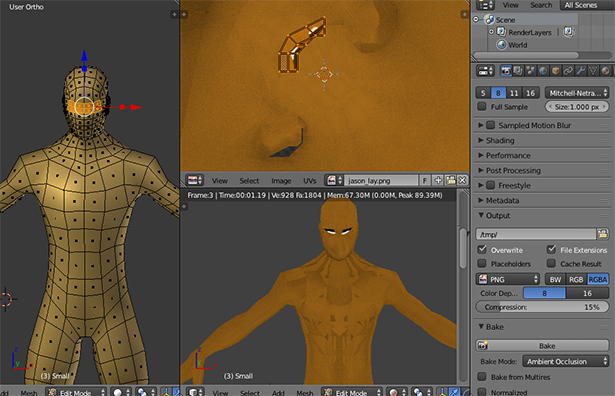
- Quick Step:โปรแกรม Blender การสร้าง Texture ด้วย UV Mapping
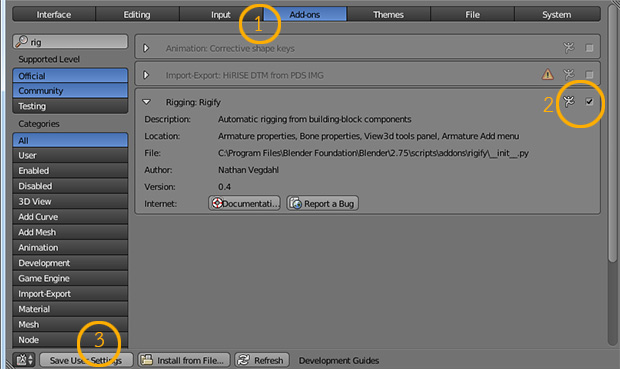
เมื่อเปิดโปรแกรมขึ้นมาแล้วให้ไปที่เมนู User Preference ครับ
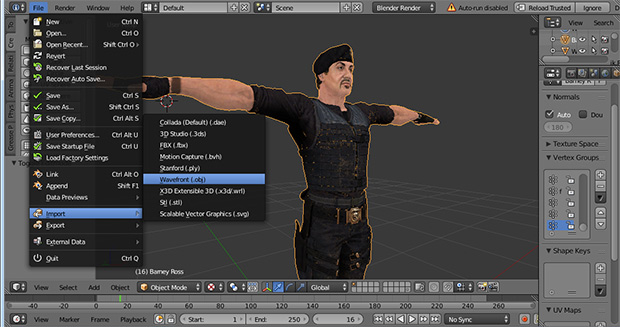
ทำการ Import ไฟล์โมเดลของเราขึ้นมาหากเอามาจากโปรแกรมอื่นให้ใช้ .obj มาวางในโปรแกรมกด Alt+z, Alt+x เพื่อดูลาย Texture

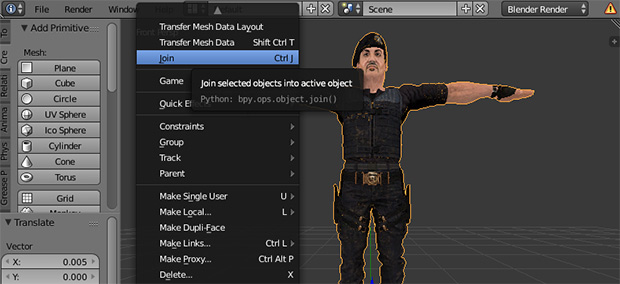
คลิกขวาที่โมเดลทุกชิ้นแล้วเลือก Object -> Apply -> Make Duplicates Real
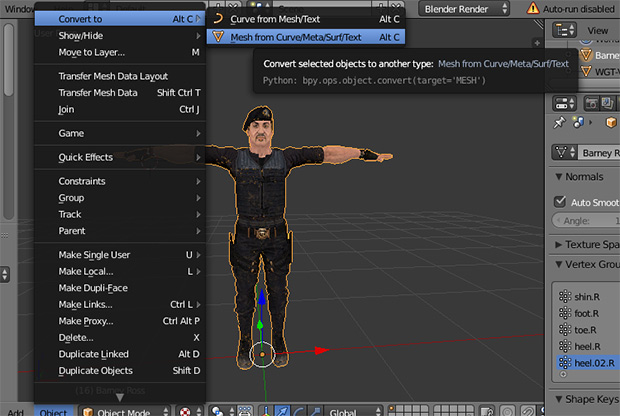
ทำการ Convert to -> Mesh from Curve/Meta/Surf/Text แล้วทำการ Link ให้เรียบร้อย

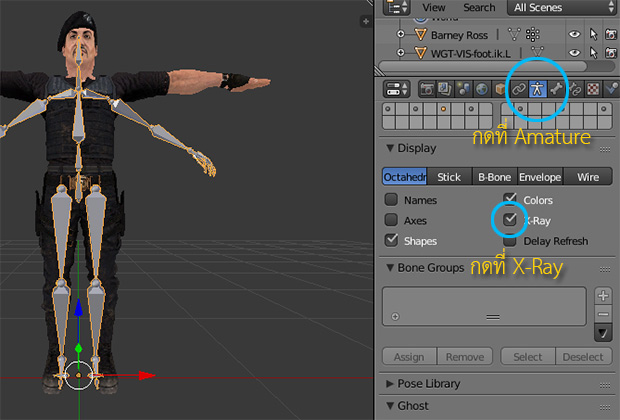
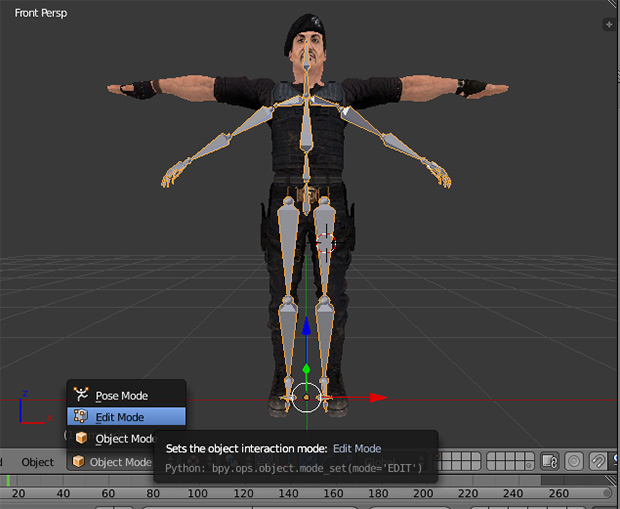
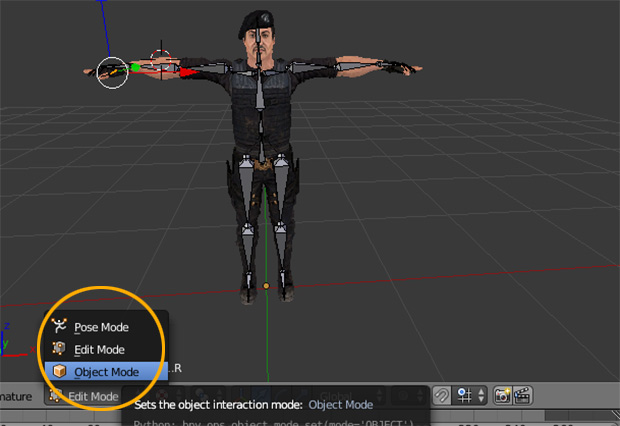
คลิกขวาที่กระดูก (Bone) เปลี่ยนโหมดจาก Object Mode ให้เป็น Edit Mode
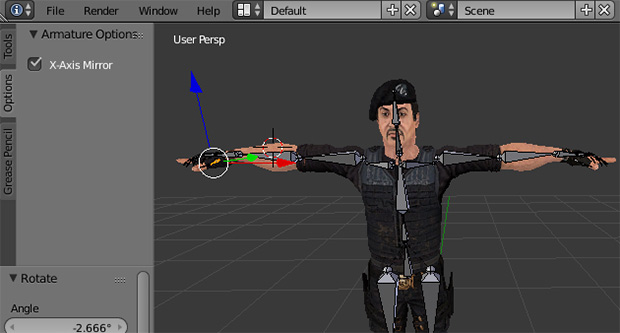
ปรับที่ Tab X-Axis Mirror เพื่อเวลาปรับข้างขวา ข้างซ้ายหรือฝั่งตรงข้ามจะมีผลลัพธ์เหมือนกัน ทำการปรับกระดูกให้ตรงท่าทางของตัวละคร แล้วออกจาก Edit Mode ไปที่ Object Mode (อย่าลืมปิด X-Axis Mirror)
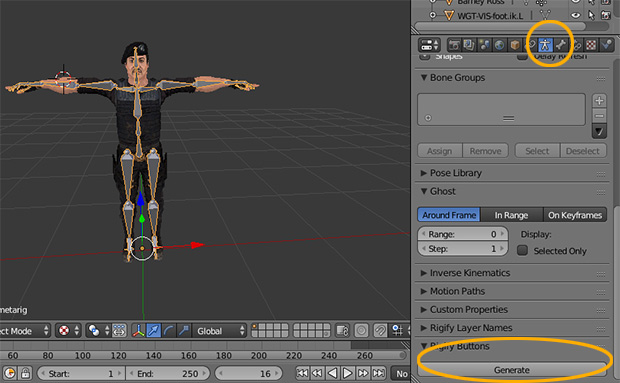
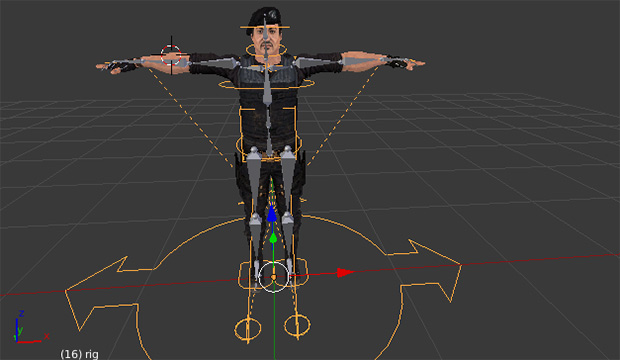
คลิกที่เมนู Armature แล้วทำการ Generate Bone เพื่อสร้างเส้น Weights
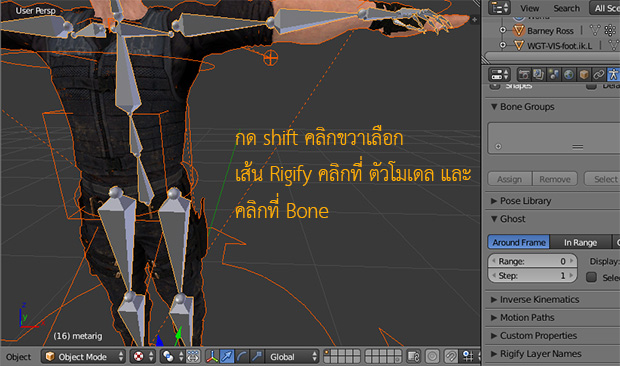
คลิกขวาที่ เส้น Guild Weight กด shift คลิกขวาที่โมเดล และคลิกขวาที่ Bone เป็นตำแหน่งสุดท้ายเพื่อสร้าง Parents เมื่อครบแล้วกด Ctrl+P เลือก “with Automatic Weights”

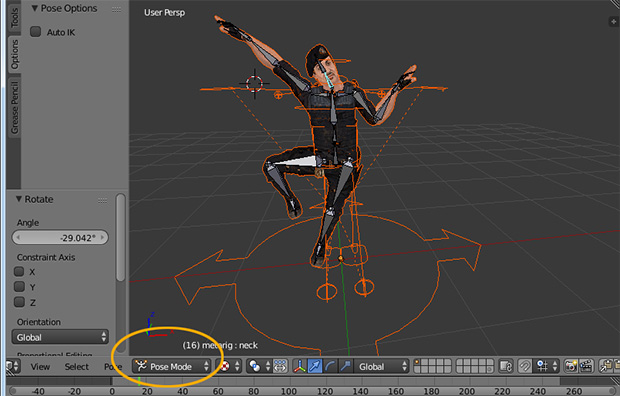
ถ้าโมเดลเป็น single Mesh หรือวัตถุชิ้นเดียวไม่มีอะไรแยกอยู่ เราจะขยับได้กดเปลี่ยนจาก Object Mode เป็น Pose Mode
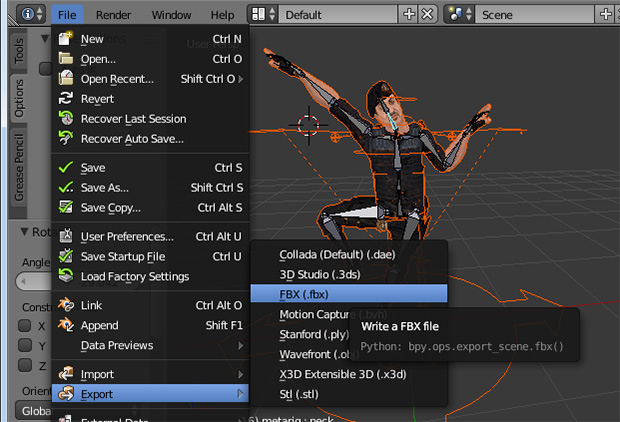
เราสามารถ Export เป็น .FBX เพื่อใช้กับ Unity 3D ครับ ศึกษาได้จากบทความนี้
- เขียนเกม Unity การทำ Humanoid ให้กับ โมเดลตัวละคร 3 มิติ
- เขียนเกม 3 มิติด้วย Unity การใช้ Animator Controller