

บทเรียนนี้จะเป็นการพัฒนา Mobile Web App ด้วย Framework Sencha Touch 2 ด้วยการทำงานร่วมกับ Webservice รูปแบบ JSON ครับ
เอาเป็นว่าขอต่อเนื่องจากบทความก่อนหน้านี้เลยแล้วกันจากบทความ
รอบนี้จะเป็นการพัฒนาแอพพลิเคชันของคุณตัวแรก
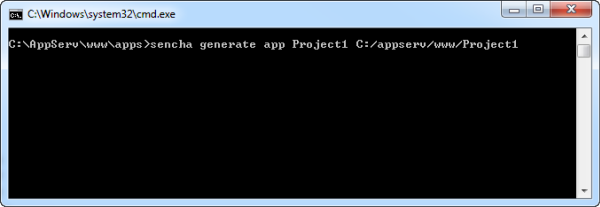
ให้เปิด cmd ขึ้นมา ทำการพิมพ์คำสั่ง
C:/Appserv/www/sencha_touch> sencha generate app Project1 C:/appserv/www/Project1
กด Enter รอการ Create ตัว Project ของเราเสร็จเรียบร้อยจาก Sencha Cmd
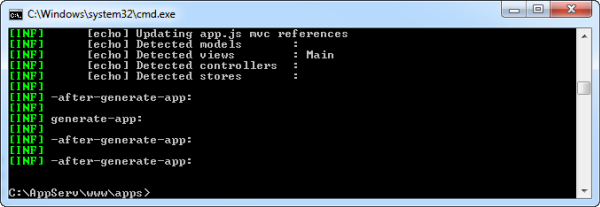
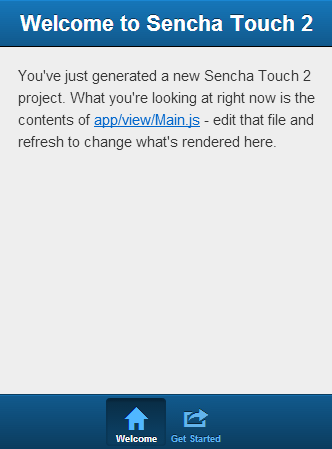
เมื่อเสร็จเรียบร้อยให้ทำการรันตัวโปรเจ็คของเราผ่าน บราวเซอร์กันหน่อยครับพิมพ์ไปที่
http://127.0.01/Project1/
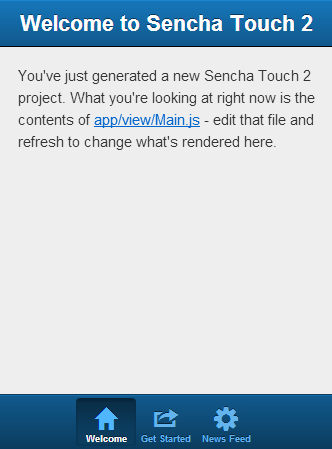
จะเห็นแอพพลิเคชันของเราในรูปแบบปรกติอยู่ที่นี่
เปิดโปรแกรม Text Editor ขึ้นมาครับตัวไหนก็ได้แล้วก็ เปิดไฟล์ C:/Apperv/www/Project1/app/view/Main.js ขึ้นมา
จะเจอ Code เบื้องต้นที่ Generate มาจาก Sencha Cmd
ไปที่บรรทัดส่วนของ
config: {
        tabBarPosition: 'bottom',

        items: [
สังเกตว่าแอพพลิเคชันของเราจะมี หน้าจอการทำงานที่สร้างขึ้นมาแล้ว 2 หน้าคือ หน้า “Welcome to Sencha Touch 2” และหน้า “Getting Started” ครับใน Code ตำแหน่งนี้
items: [
            {
                title: 'Welcome',
                iconCls: 'home',

                styleHtmlContent: true,
                scrollable: true,

                items: {
                    docked: 'top',
                    xtype: 'titlebar',
                    title: 'Welcome to Sencha Touch 2'
                },

                html: [
                    "You've just generated a new Sencha Touch 2 project. What you're looking at right now is the ",
                    "contents of app/view/Main.js - edit that file ",
                    "and refresh to change what's rendered here."
                ].join("")
            },
            {
                title: 'Get Started',
                iconCls: 'action',

                items: [
                    {
                        docked: 'top',
                        xtype: 'titlebar',
                        title: 'Getting Started'
                    },
                    {
                        xtype: 'video',
                        url: 'http://av.vimeo.com/64284/137/87347327.mp4?token=1330978144_f9b698fea38cd408d52a2393240c896c',
                        posterUrl: 'http://b.vimeocdn.com/ts/261/062/261062119_640.jpg'
                    }
                ]
            }
        ]
โดยมีการแบ่งแต่ละหน้าด้วย
{
                title: 'Welcome',
                iconCls: 'home',

                styleHtmlContent: true,
                scrollable: true,

                items: {
                    docked: 'top',
                    xtype: 'titlebar',
                    title: 'Welcome to Sencha Touch 2'
                },

                html: [
                    "You've just generated a new Sencha Touch 2 project. What you're looking at right now is the ",
                    "contents of app/view/Main.js - edit that file ",
                    "and refresh to change what's rendered here."
                ].join("")
            }
และ
{
                title: 'Get Started',
                iconCls: 'action',

                items: [
                    {
                        docked: 'top',
                        xtype: 'titlebar',
                        title: 'Getting Started'
                    },
                    {
                        xtype: 'video',
                        url: 'http://av.vimeo.com/64284/137/87347327.mp4?token=1330978144_f9b698fea38cd408d52a2393240c896c',
                        posterUrl: 'http://b.vimeocdn.com/ts/261/062/261062119_640.jpg'
                    }
                ]
            }
หากต้องการเพิ่ม หน้าใหม่ ซึ่งผมจะใช้ Icon เป็นรูป settings หรือเฟือง แล้วมี Title ว่า News Feed ผมสามารถเพิ่มโดยการ เพิ่ม , ต่อท้าย } ของ item ล่าสุด แล้วใส่ code ต่อไปนี้
   xtype: 'nestedlist',
   title: 'News Feed',
   iconCls: 'settings',
   cls: 'blog',
   displayField: 'title',
ต่อไปเราจะใช้ข้อมูล Feed จากเว็บไซต์ มาแปลงเป็น JSON Web Service ด้วย Google API ครับ
http://ajax.googleapis.com/ajax/services/feed/load?v=1.0&num=10&
ตัวอย่างที่ผมจะไปเอา Feed มานั้นคือ Feed ของเว็บไซต์ ข่าวอย่าง Manager ไปหา RSS มาครับ
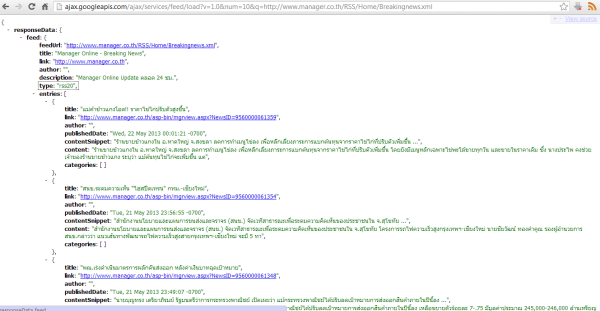
ทำการแปลง RSS ให้เป็น JSON โดยการยิง URL ต่อไปนี้ครับ
โดยค่า num นั้นคือจำนวน ข่าวที่ต้องการจะโชว์เบื้องต้นผมใส่ไป 10 ก่อน ถ้าถูกต้อง บาวเซอร์เราจะแสดงผลแบบนี้ครับ
ต่อมากลับมาที่ Main.js ใส่ Code ไปนี้ลงไปต่อท้าย “,”
,{
                    xtype: 'nestedlist',
                    title: 'News Feed',
					iconCls: 'settings',
                    cls: 'blog',
                    displayField: 'title',

                    store: {
                        type: 'tree',

                        fields: ['title', 'link', 'author', 'contentSnippet', 'content', {
                            name: 'leaf',
                            defaultValue: true
                        }],

                        root: {
                            leaf: false
                        },

                        proxy: {
                            type: 'jsonp',
                            url: 'http://ajax.googleapis.com/ajax/services/feed/load?v=1.0&num=10&q=http://www.manager.co.th/RSS/Home/Breakingnews.xml',
                            reader: {
                                type: 'json',
                                rootProperty: 'responseData.feed.entries'
                            }
                        }
                    },

                    detailCard: {
                        xtype: 'panel',
                        scrollable: true,
                        styleHtmlContent: true
                    },

                    listeners: {
                        itemtap: function(nestedList, list, index, element, post) {
                            this.getDetailCard().setHtml(post.get('content'));
                        }
                    }
                }
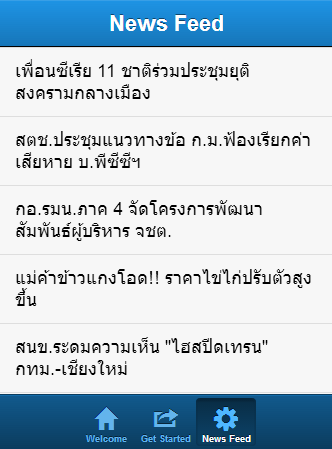
ถ้าไม่ผิดพลาดอะไร ลองรันที่ แอพพลเคชันของเราจะได้เมนู Tab ใหม่ขึ้นมาชื่อว่า News Feed
ลองทดสอบกดดู จะได้หน้าจอแบบนี้
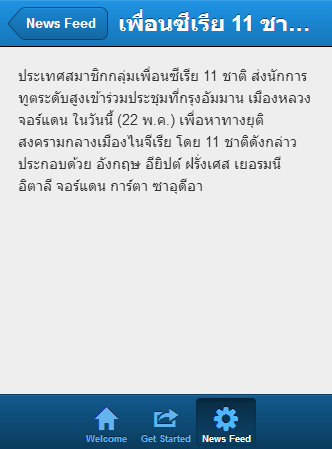
และถ้ากดที่ข่าว หน้าจอแอพพลิเคชันของเราจะเลื่อนไปแสดงผลหน้า content ทันที
ถือว่าเป็นอีกหนึ่งบทเรียนที่น่าสนใจครับกับการเริ่มต้นพัฒนาแอพพลิเคชันเชื่อมต่อ Web Service อย่าง JSON ครับ
ดาวน์โหลด Source Code ได้ที่:
https://code.google.com/p/daydev/downloads/detail?name=Project1.zip

Thanks