รีวิว SDK สำหรับทำ Augmented Reality หรือ AR โดยไม่ใช้ Marker (Markerless) ใช้แค่ระบบระบุตำแหน่งพิกัดLocation Service บน Unity 3D อย่างง่ายผ่าน Kudan SDK

รีวิว SDK น่าสนใจอย่าง Kudan SDK มาพัฒนา Location Based AR โดยไม่ต้องใช้ Marker ในการ Detect ซึ่งผมได้ไปเจอ Tutorial จากเว็บไซต์ https://www.kudan.eu และ Github ของ Hynra ซึ่งพอศึกษาดูแล้วทำได้ง่ายทีเดียวครับ
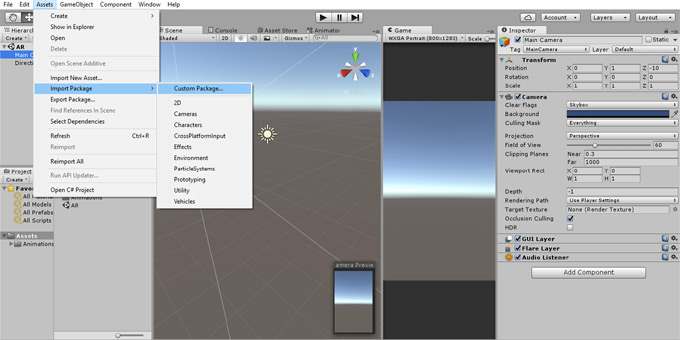
ไปที่เว็บไซต์ https://www.kudan.eu/download/ เพื่อดาวน์โหลด Package ของ Kudan SDK มาใช้งานร่วมกับ Unity
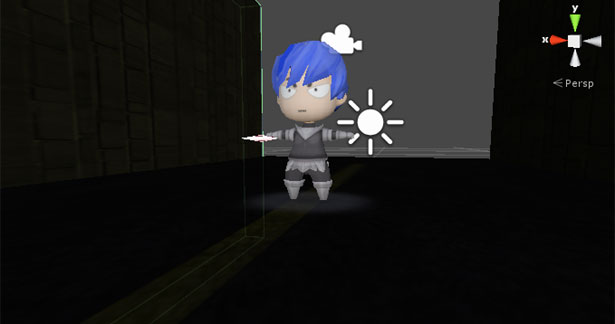
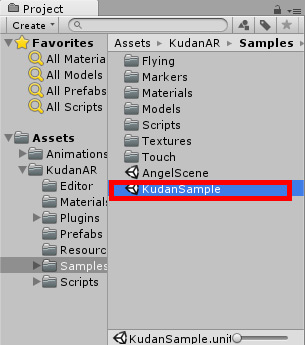
ในตัวอย่างนี้จะมี Sample App มาให้ครับอยู่ที่ Folder ของ Kudan SDK เลยที่
Assets->KudanAR->Samples->KudanSample.scene
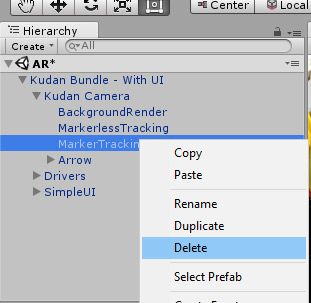
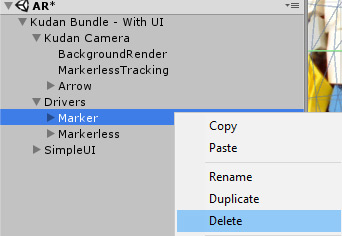
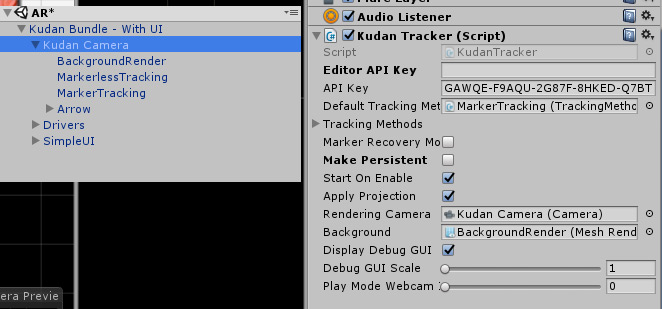
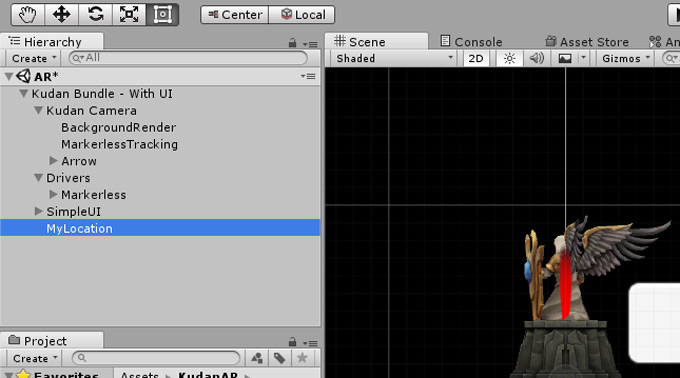
เมื่อเปิดขึ้นมาแล้วจะมี Scene ที่พร้อมใช้งานทันทีนั่นให้เรา ลบส่วนที่ไม่จำเป็นคือ TargetMarker ออกครับ
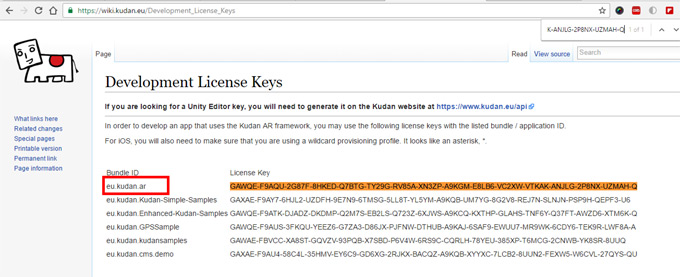
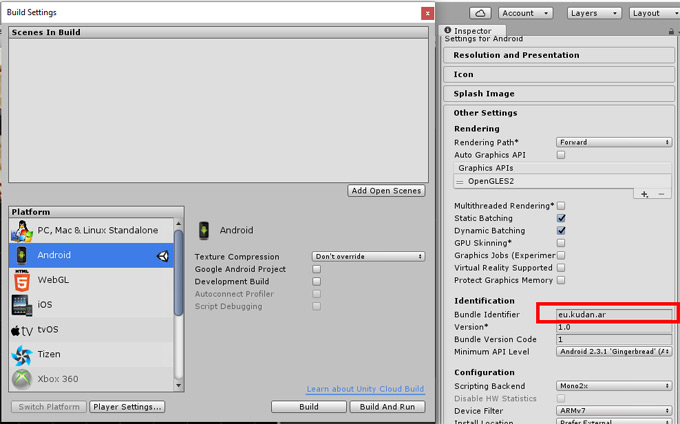
สำหรับ Kudan จะมี Developer License Key ให้เราทดลองใช้อยู่ที่เว็บไซต์ของ Kudan เองที่ License Key อยู่ในเว็บไซต์ https://wiki.kudan.eu/Development_License_Keys ซึ่งเราต้องทำการ Copy ตัว Bundles ให้คล้ายกับ License ของเขาครับ
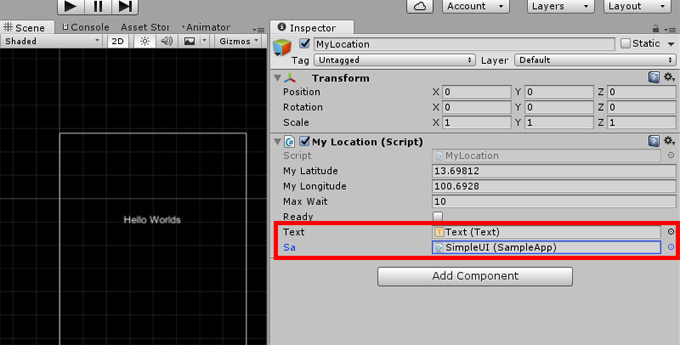
สร้าง Empty GameObject ขึ้นมาใหม่ตั้งชื่อว่า MyLocation แล้วสร้าง file C# ขึ้นมาว่า MyLocation.cs ครับ ประกาศตัวแปรส่วนของพิกัดตามนี้ (ใช้ Google Maps จับ Lat, Lon ตำแหน่งของเรานะครับ)
        private Vector2 targetCoordinates;
	private Vector2 deviceCoordinates;
	public float distanceFromTarget = 0.0004f;
	public float proximity = 0.005f;
	private float sLatitude, sLongitude;
	public float myLatitude = 13.69815f;
	public float myLongitude = 100.697f;
	private bool enableByRequest = true;
	public int maxWait = 10;
	public bool ready = false;
	public Text text;
	public SampleApp sa;
ตำแหน่ง Target อยู่ที่
public float myLatitude = 13.69815f;
public float myLongitude = 100.697f;
โดยสามารถคลาดเคลื่อนได้สูงถึงค่าที่เรากำหนด หรือปรับได้ตามชอบใจ แต่ถ้าใกล้มากจะไม่ค่อยจับเจอครับ
public float distanceFromTarget = 0.0004f;
public float proximity = 0.005f;
ประกาศ using class เพิ่มเข้ามาใน myLocation.cs ครับ
using UnityEngine;
using System.Collections;
using UnityEngine.UI;
using Kudan.AR.Samples;
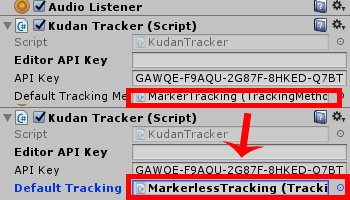
เพื่อทำการทำงาน UI ของ Unity เช่น Text และเรียกใช้งาน Sample App Class ที่มากับ Kudan SDK ครับ ผ่านตัวแปร
public Text text;
public SampleApp sa;
ทำการเรียกตำแหน่งของเราตอนเล่นแอพฯ ทันทีที่เมธอด Start()
void Start(){
  targetCoordinates = new Vector2 (myLatitude, myLongitude);
  StartCoroutine (getLocation ());
}
ดังนั้นเราต้องประกาศ getLocation() เป็น เมธอดใหม่ทันที
IEnumerator getLocation(){
		LocationService service = Input.location;
		if (!enableByRequest && !service.isEnabledByUser) {
			Debug.Log("Location Services not enabled by user");
			yield break;
		}
		service.Start();
		while (service.status == LocationServiceStatus.Initializing && maxWait > 0) {
			yield return new WaitForSeconds(1);
			maxWait--;
		}
		if (maxWait < 1){
			Debug.Log("Timed out");
			yield break;
		}
		if (service.status == LocationServiceStatus.Failed) {
			Debug.Log("Unable to determine device location");
			yield break;
		} else {
			text.text = "Target Location : "+myLatitude + ", "+myLongitude+"\nMy Location: " + service.lastData.latitude + ", " + service.lastData.longitude;
			sLatitude = service.lastData.latitude;
			sLongitude = service.lastData.longitude;
		}
		ready = true;
		startCalculate ();
	}
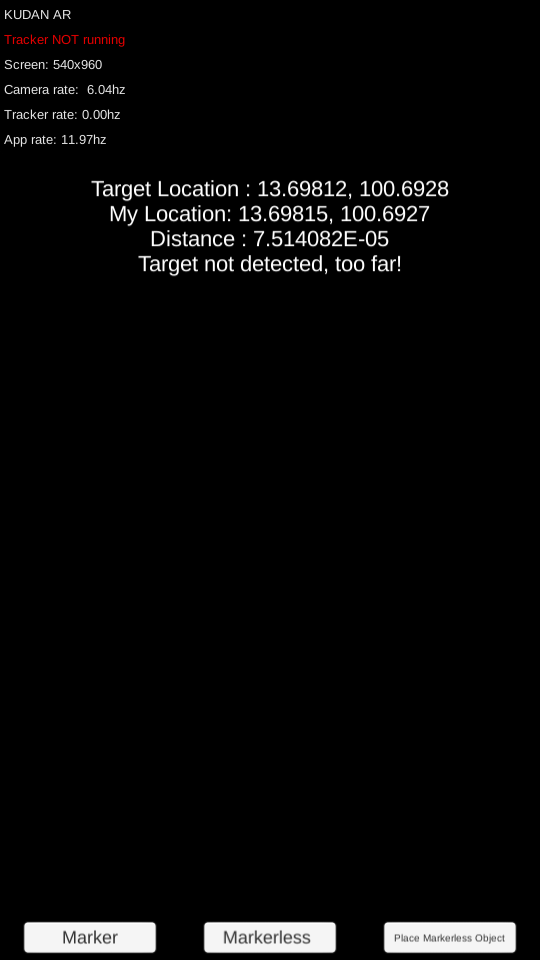
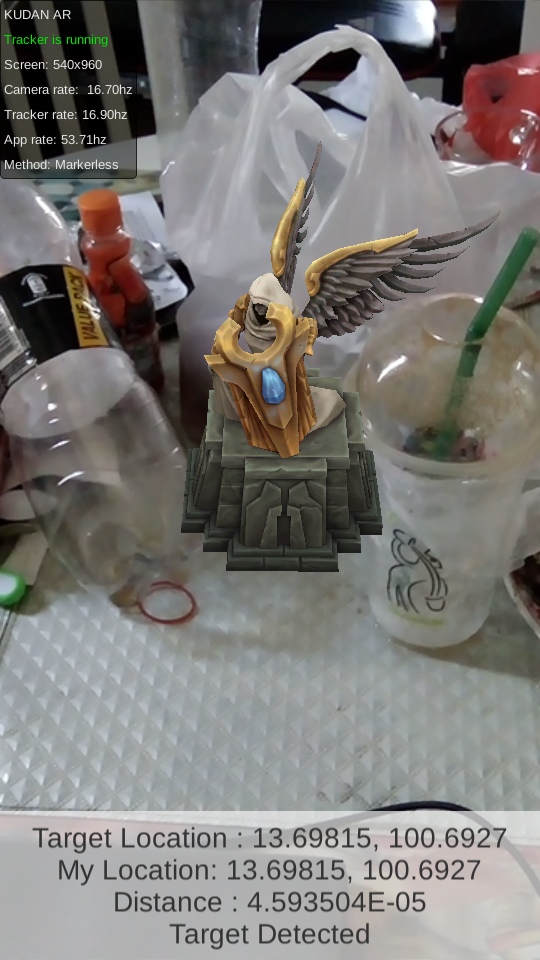
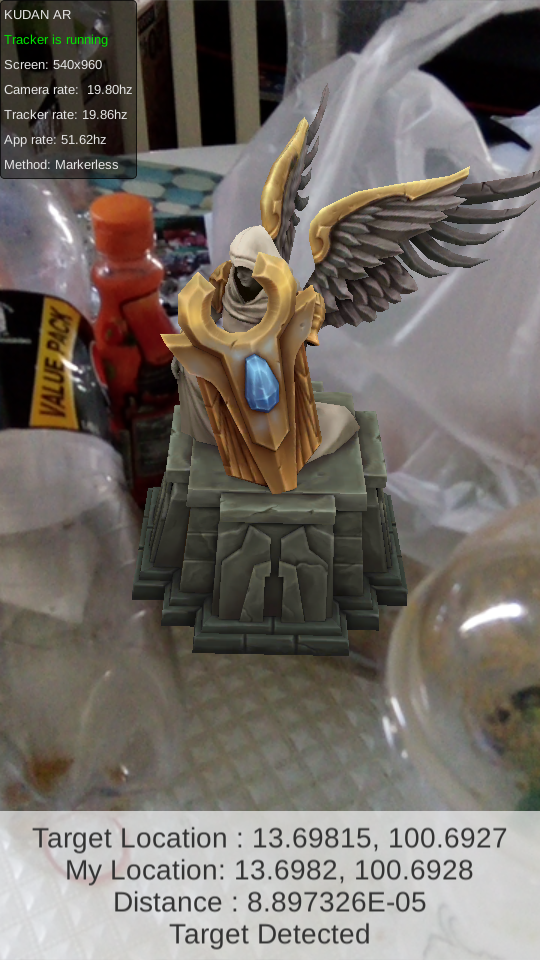
ไว้แสดงตำแหน่งที่กำหนด Target Location และตำแหน่งที่จับได้จากอุปกรณ์ service.lastData มาแสดงผ่าน UI ครับสร้างฟังก์ชันในการคำนวณพิกัด แล้ววัดระยะจากค่าที่กำหนด
public void startCalculate(){
		deviceCoordinates = new Vector2 (sLatitude, sLongitude);
		proximity = Vector2.Distance (targetCoordinates, deviceCoordinates);
		if (proximity <= distanceFromTarget) {
			text.text = text.text + "\nDistance : " + proximity.ToString ();
			text.text += "\nTarget Detected";
			sa.StartClicked ();
		} else {
			text.text = text.text + "\nDistance : " + proximity.ToString ();
			text.text += "\nTarget not detected, too far!";
		}
	}
ภาพรวมของไฟล์ myLocation.cs จะเป็นดังนี้
using UnityEngine;
using System.Collections;
using UnityEngine.UI;
using Kudan.AR.Samples;

public class MyLocation : MonoBehaviour {
	private Vector2 targetCoordinates;
	private Vector2 deviceCoordinates;
	public float distanceFromTarget = 0.0004f;
	public float proximity = 0.005f;
	private float sLatitude, sLongitude;
	public float myLatitude = 13.69815f;
	public float myLongitude = 100.697f;
	private bool enableByRequest = true;
	public int maxWait = 10;
	public bool ready = false;
	public Text text;
	public SampleApp sa;

	void Start(){
		targetCoordinates = new Vector2 (myLatitude, myLongitude);
		StartCoroutine (getLocation ());
	}

	IEnumerator getLocation(){
		LocationService service = Input.location;
		if (!enableByRequest && !service.isEnabledByUser) {
			Debug.Log("Location Services not enabled by user");
			yield break;
		}
		service.Start();
		while (service.status == LocationServiceStatus.Initializing && maxWait > 0) {
			yield return new WaitForSeconds(1);
			maxWait--;
		}
		if (maxWait < 1){
			Debug.Log("Timed out");
			yield break;
		}
		if (service.status == LocationServiceStatus.Failed) {
			Debug.Log("Unable to determine device location");
			yield break;
		} else {
			text.text = "Target Location : "+myLatitude + ", "+myLongitude+"\nMy Location: " + service.lastData.latitude + ", " + service.lastData.longitude;
			sLatitude = service.lastData.latitude;
			sLongitude = service.lastData.longitude;
		}
		ready = true;
		startCalculate ();
	}


	public void startCalculate(){
		deviceCoordinates = new Vector2 (sLatitude, sLongitude);
		proximity = Vector2.Distance (targetCoordinates, deviceCoordinates);
		if (proximity <= distanceFromTarget) {
			text.text = text.text + "\nDistance : " + proximity.ToString ();
			text.text += "\nTarget Detected";
			sa.StartClicked ();
		} else {
			text.text = text.text + "\nDistance : " + proximity.ToString ();
			text.text += "\nTarget not detected, too far!";
		}
	}
}
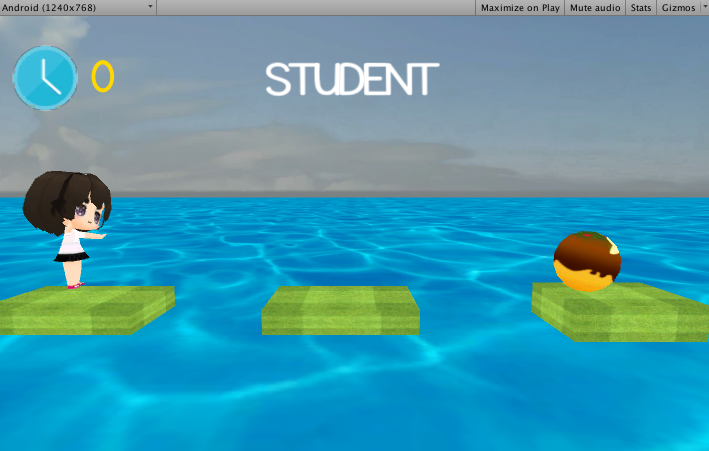
สร้าง UI ส่วนของ Text ขึ้นมารับค่า
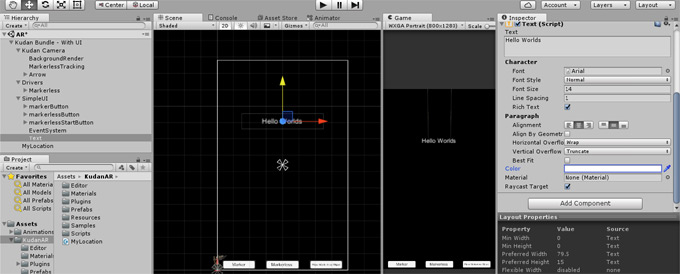
ลาก Text UI ไปวางที่ Text บน MyLocation Class และ Sample App ที่เป็นส่วนของ SampleUI ไปวางที่ Sa ตามภาพด้านล่าง
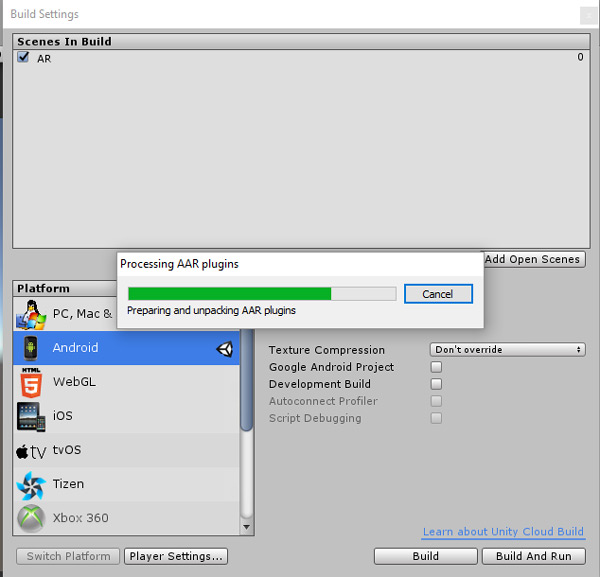
ไปที่ Build Settings ปรับค่า Version ของ Android เป็น 15 แล้วทำการ Build
ทดสอบแอพพลิเคชัน AR ของเราอย่าลืมเปิด GPS บนเครื่องสมาร์ทโฟน Android ของเรา
เป็นอีกหนึ่ง Tutorial ที่น่าสนใจ และง่ายดีครับ เผื่อใครอยากจะทำ Application แนว AR ร่วมกับระบบ Location-Based Services ดึงพิกัดมาแสดง 3D Content ก็น่าจะทำง่ายขึ้น ส่วนราคาก็แล้วแต่พิจารณาดูครับว่า เหมาะหรือเปล่า เมื่อแลกกับความง่ายในการพัฒนาอย่างเจ้า Kudan SDK ตัวนี้ครับ