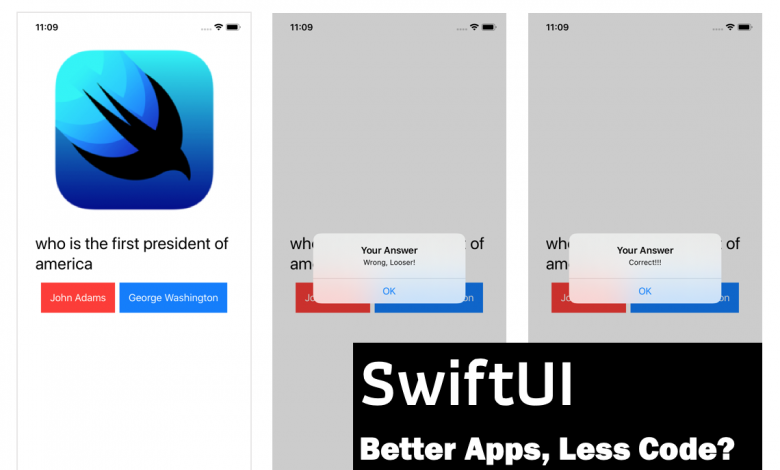
บทเรียน SwiftUI นี้เราจะได้เรียนรู้วิธีการจัดวาง UI โดยการประกาศและแก้ไขมุมมองและวิธีการใช้ State variables เพื่ออัปเดต UI ของคุณด้วย XCode
ในเวอร์ชันหลังของ XCode เวอร์ 11.3 มาจะเริ่มใช้ SwiftUI คละไปกับ UIKit ถามว่ายากไหมถ้าสาย dev ที่ใช้ UIKit มานานแล้วมาเจอการพัฒนา UI ด้วย SwiftUI มีความงุนงงพอประมาณแน่นอน แต่ถ้าใครที่เป็นสาย Flutter ของ Google อยู่แล้ว จะรู้ว่า SwiftUI คือการได้รับแรงบันดาลใจจาก Dart และ Flutter ดังนั้นใครที่เป็นสาย Dart ก็จะสบายๆ ชิลๆ
SwiftUI คุณต้องทิ้ง Interface Builder (IB) และ StoryBoard ไปเลย ฮาว ทู ทิ้ง! นั่นแหละ ไม่ต้องพูดเยอะมาลองดูบทเรียนกันดีกว่ารอบนี้อัพเด็ต XCode เป็นเวอร์ชัน 11.3 ซะ
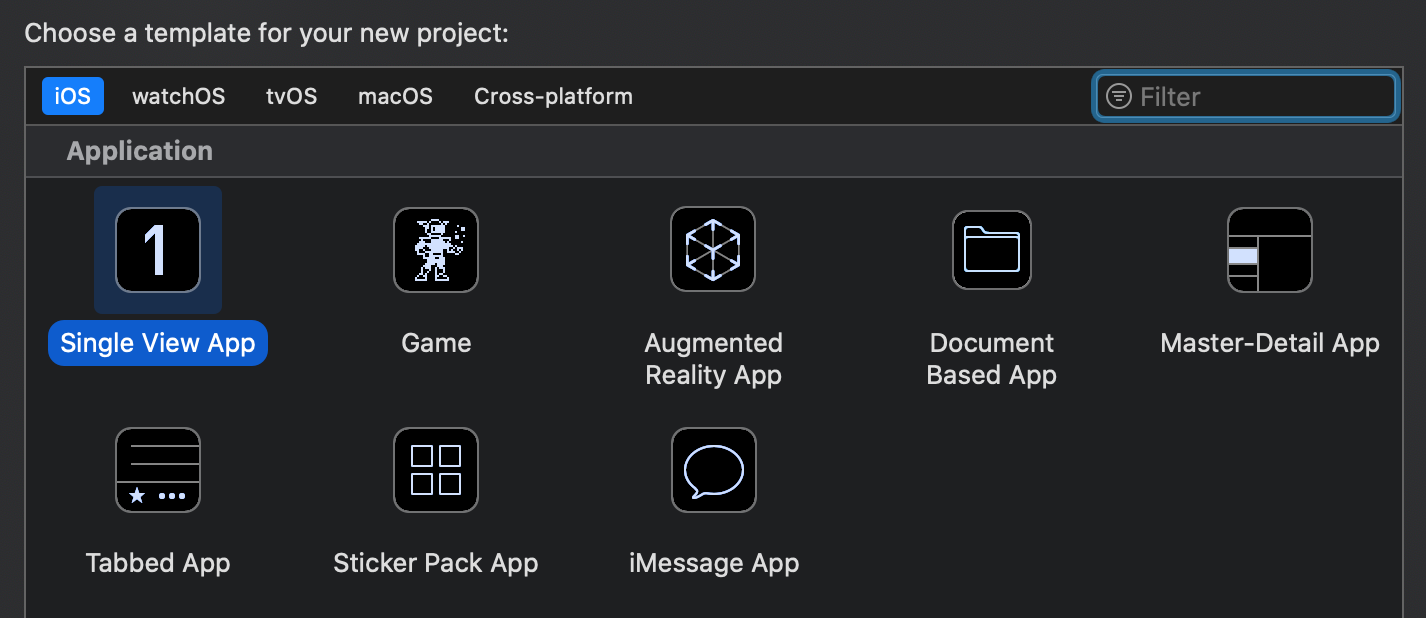
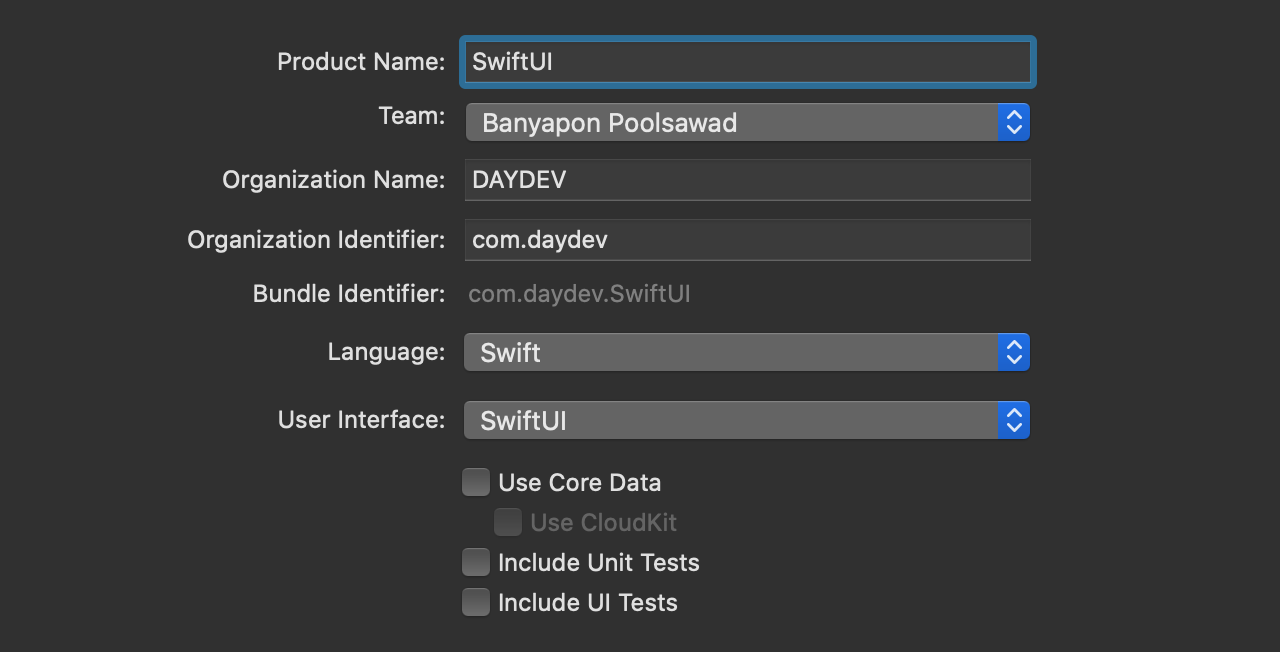
เปิด XCode 11.3 ขึ้นมาสร้าง New Xcode project (กด Shift-Command-N), เลือก iOS ▸ Single View App ตั้งชื่อซะ
พอเริ่มสร้าง Project แล้วลองสังเกตใน Project Navigator ของเราแต่ก่อนจะประกอบไปด้วยไฟล์ AppDelegate.swift ตอนนี้แบ่งออกเป็น AppDelegate.swift และ SceneDelegate.swift และใน code จะเห็นว่าใน SceneDelegate จะมีคำสั่ง window
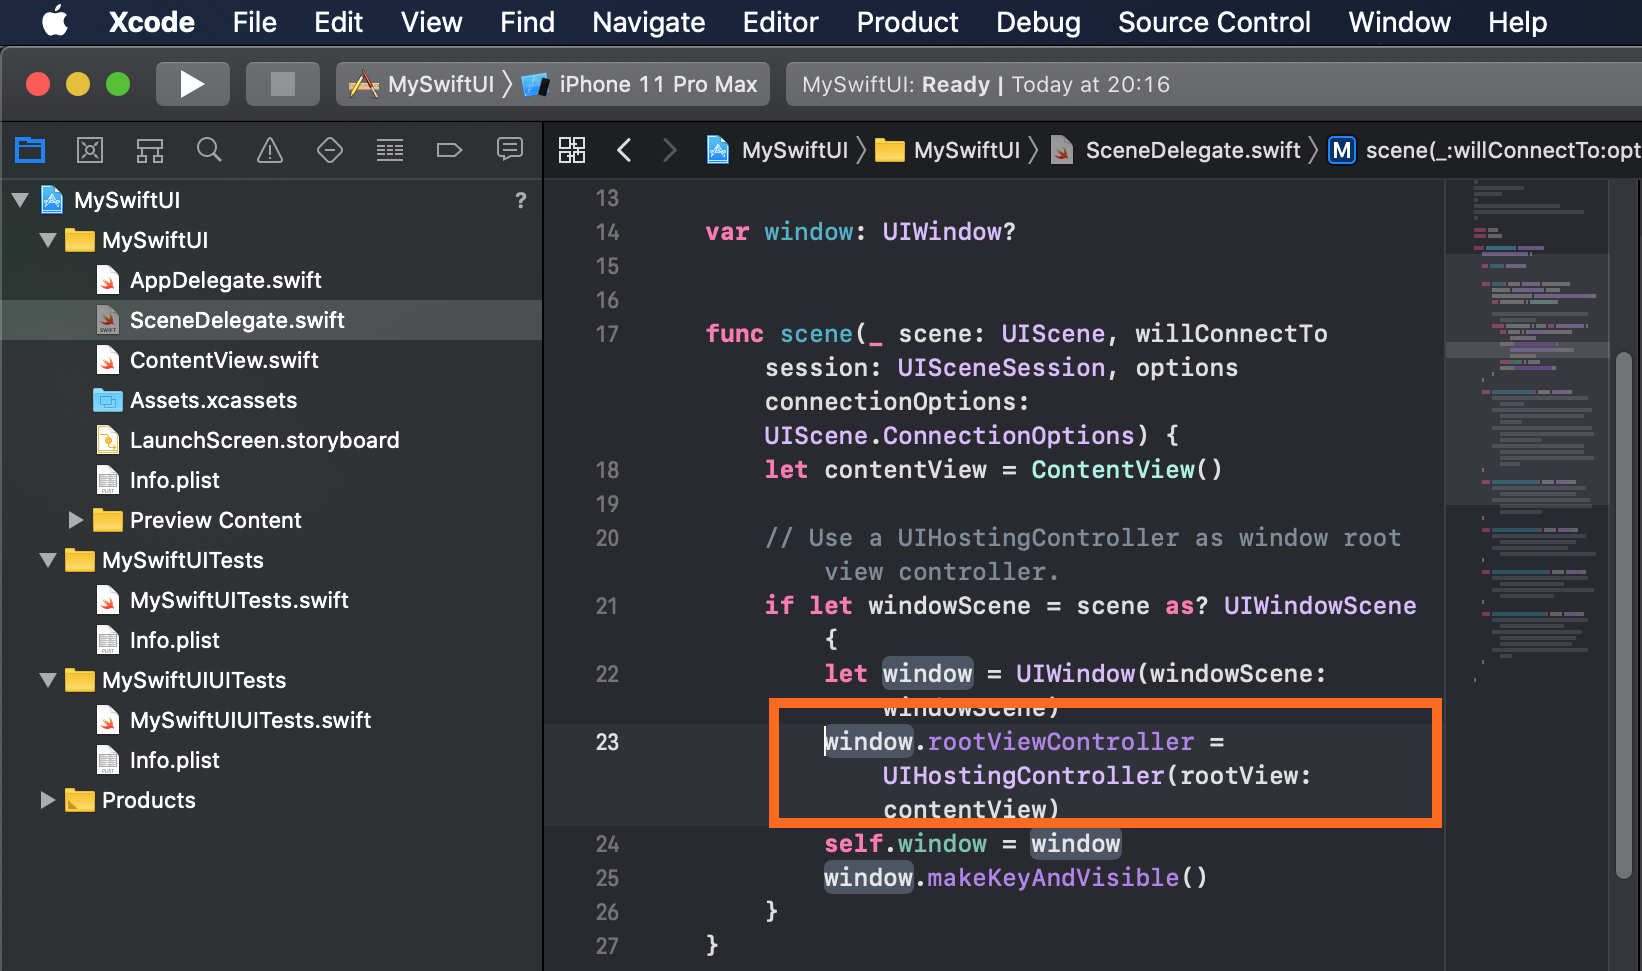
ซึ่งถ้าดูดีๆ SceneDelegate นั้นไม่ได้เกี่ยวอะไรกับ SwiftUI เลย จะมีแค่บรรทัดนี้บรรทัดเดียวที่เกี่ยวข้อง:
window.rootViewController = UIHostingController(rootView: contentView())
UIHostingController สร้างตัว ViewController สำหรับควบคุมมุมมองของ SwiftUI ใน ContentView
UIHostingController ช่วยให้คุณสามารถรวม SwiftUI Views เข้ากับแอปเราแค่เพิ่ม Host หรือตัวดูแลควบคุม View Controller ลงใน StoryBoard ของคุณและสร้าง Segue (ตัวต่อขยาย) จาก UIViewController ดังนั้นถ้าเราลาก segue ไปยัง ViewController มันจะสร้าง IBSegueAction ผ่าน Hosting ของ rootView นั่นคือการทำงานหลักๆของ SwiftUI
ให้เราไปเปิดที่ ContentView ในไฟล์ ContentView.swift
struct ContentView: View {
    var body: some View {
        Text("Hello, Looser!")
    }
}
นี่คือ SwiftUI ที่ประกาศว่าเนื้อหาของ ContentView มี Text ที่แสดงคำว่า Hello Looser ผ่านโครงสร้าง struct ที่สอดคล้องใน Protocol ของ View
ด้านล่างของโครงสร้าง struct ของ ContentView, เราจะพบกับ struct ของ ContentView_Previews ทำหน้าที่สร้าง view ที่มีตัวอย่าง instance จาก struct ContentView ข้างบน
struct ContentView_Previews: PreviewProvider {
    static var previews: some View {
        ContentView()
    }
}
ทดสอบก็จะเห็นว่า แอปเราแสดงผลว่า “Hello Looser!” ดังนั้นเราลองเปลี่ยนกันหน่อยไปแก้ไข ContentViewเป็น:
struct ContentView: View {
    var body: some View {
        Text("who is the first president of america")
    }
}
แล้วกดที่ Resume ที่หน้า Preview

จะแสดงผลหน้าจอ iPhone ดังนี้:
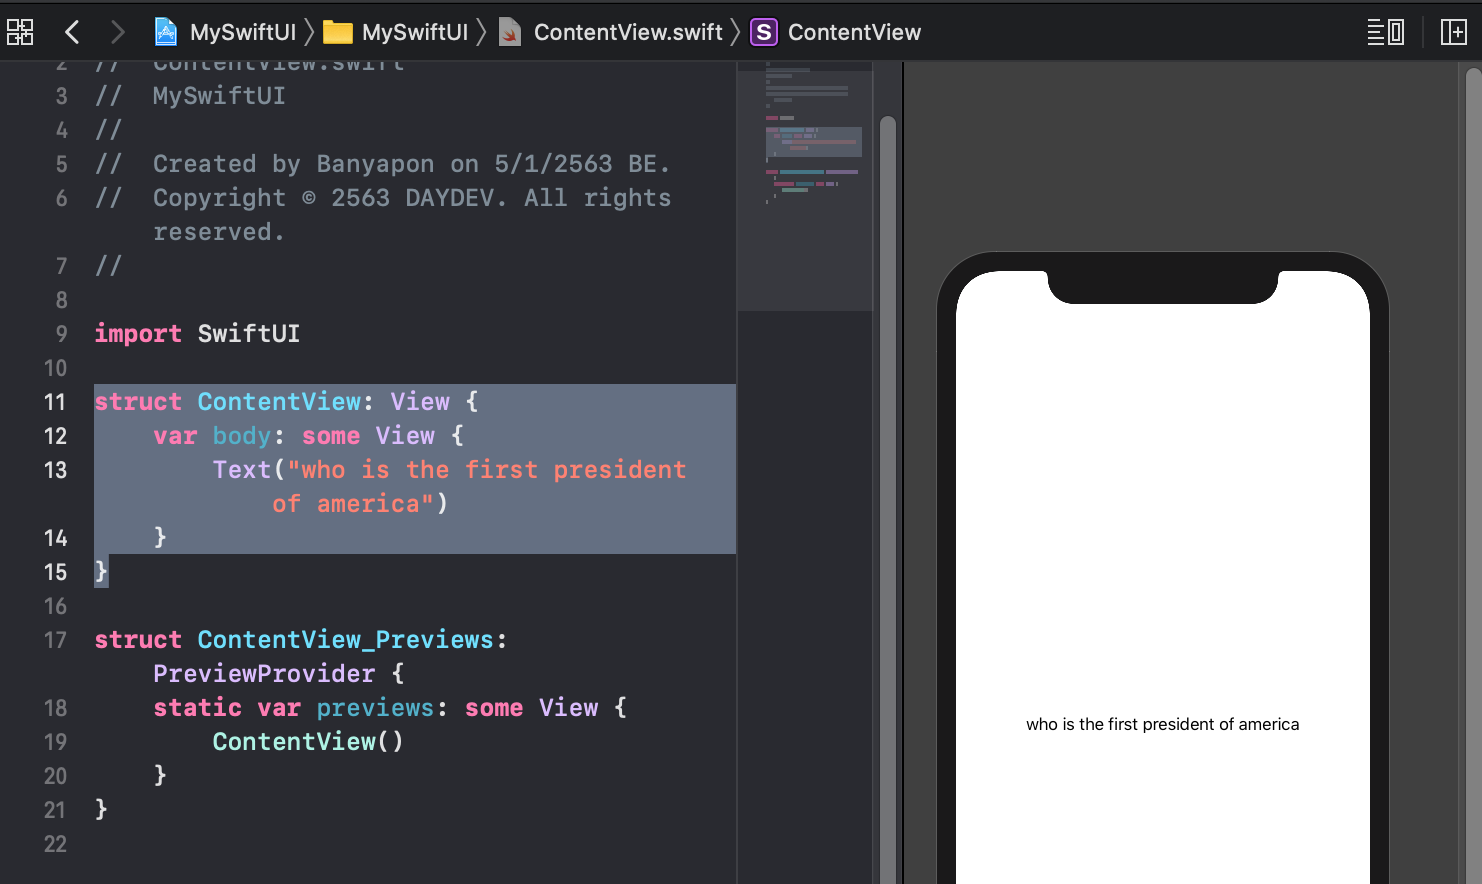
ต่อมากดปุ่ม Command แล้วคลิกที่ Text view in the preview, and select Embed in HStack:
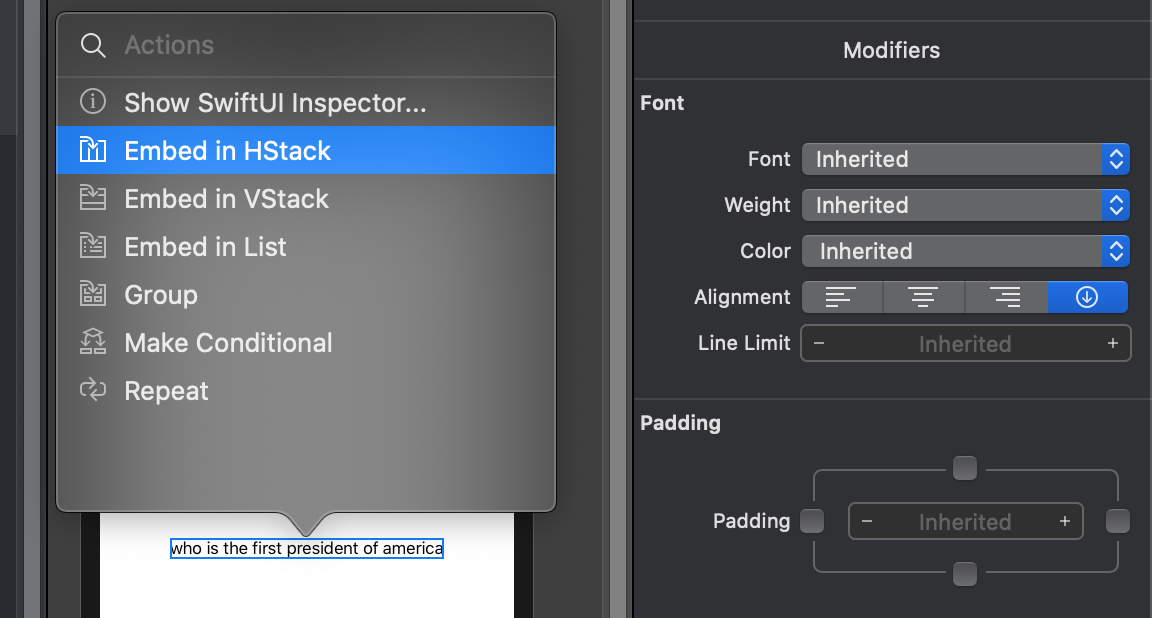
Code ใน struct ContentView ส่วนของ View จะเปลี่ยนจาก
Text("who is the first president of america")
เป็น
HStack {
  Text("who is the first president of america")
}
มีโจทย์ก็ต้องมี Choice เราจะทำการเพิ่ม Button เข้าไปต่อจาก Text() ใน HStack เลย
Button(action:{
  print("John Adams")
}){
  Text("John Adams")
}
Button(action:{
  print("George Washington")
}){
  Text("George Washington")
}
ดูใน Live Preview จะเป็นแบบนี้:
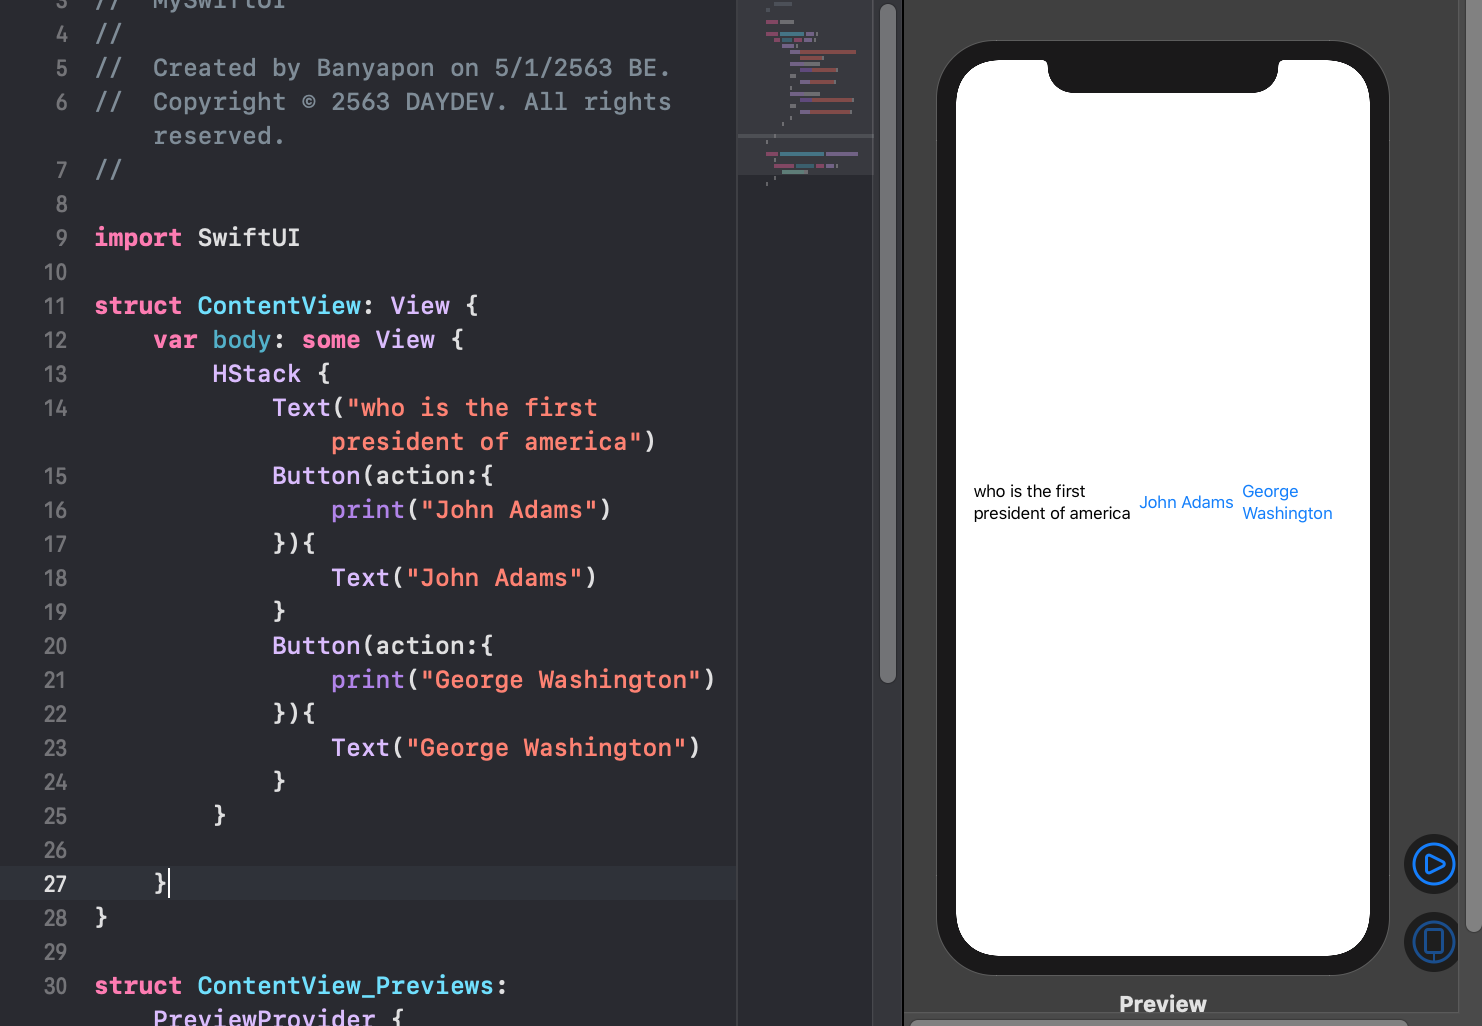
ตกทั้ง องค์ประกอบศิลป์ และ ทฤษฏี UX/UI เลยดังนั้นเราต้องปรับส่วนของ struct ตัว ContentView ใหม่เป็น:
struct ContentView: View {
    var body: some View {
        VStack {
            VStack {
                Text("who is the first president of america")
            }
            HStack {
                Button(action:{
                    print("John Adams")
                }){
                    Text("John Adams")
                }
                Button(action:{
                    print("George Washington")
                }){
                    Text("George Washington")
                }
            }
        }
    }
}
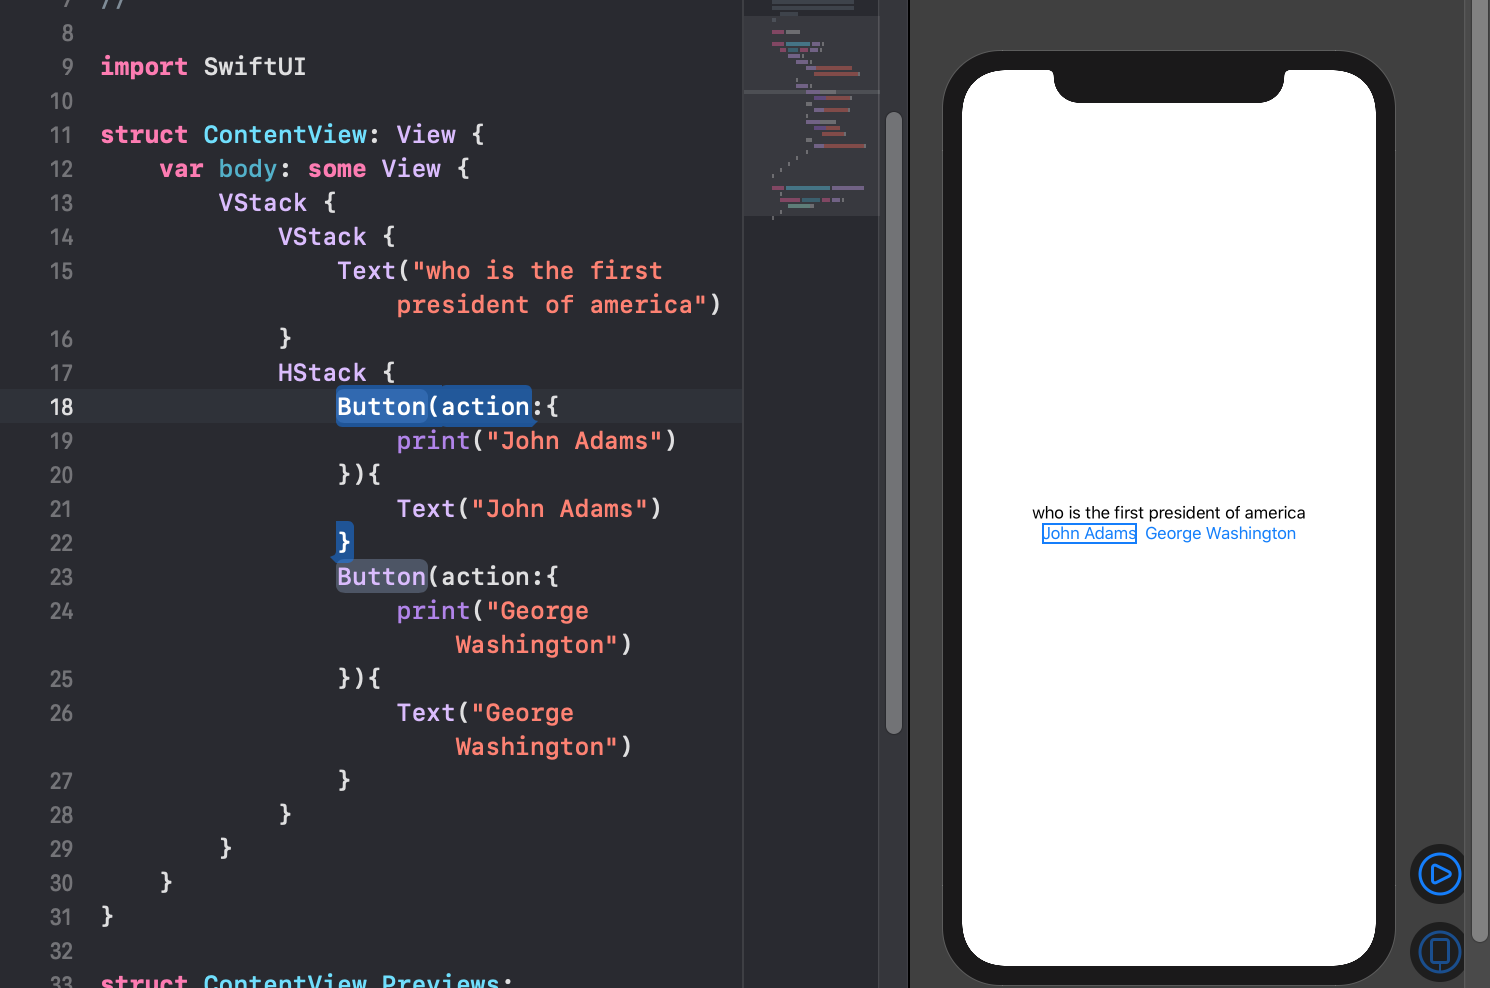
แต่ง Style ส่วนของ Text และ Button กันหน่อยให้ดูสวยๆ ใช้หลักทฤษฏีของ Bootstrap css เลย
struct ContentView: View {
    var body: some View {
        VStack {
            VStack {
                Text("who is the first president of america")
                    .padding()
                    .font(.system(size: 30))
            }
            HStack {
                Button(action:{
                    print("John Adams")
                }){
                    Text("John Adams")
                        .padding()
                    .background(Color.red)
                    .foregroundColor(.white)
                    .font(.system(size: 18))
                }
                Button(action:{
                    print("George Washington")
                }){
                    Text("George Washington")
                        .padding()
                    .background(Color.blue)
                    .foregroundColor(.white)
                    .font(
                    .system(size: 18))
                }
            }
        }
    }
}
ใส่อะไรมากมายก็แค่ Font Size, Font Color, Padding, BackGround เออ แค่นั้นก็พอละมาดูหน้าตาแอปกัน:
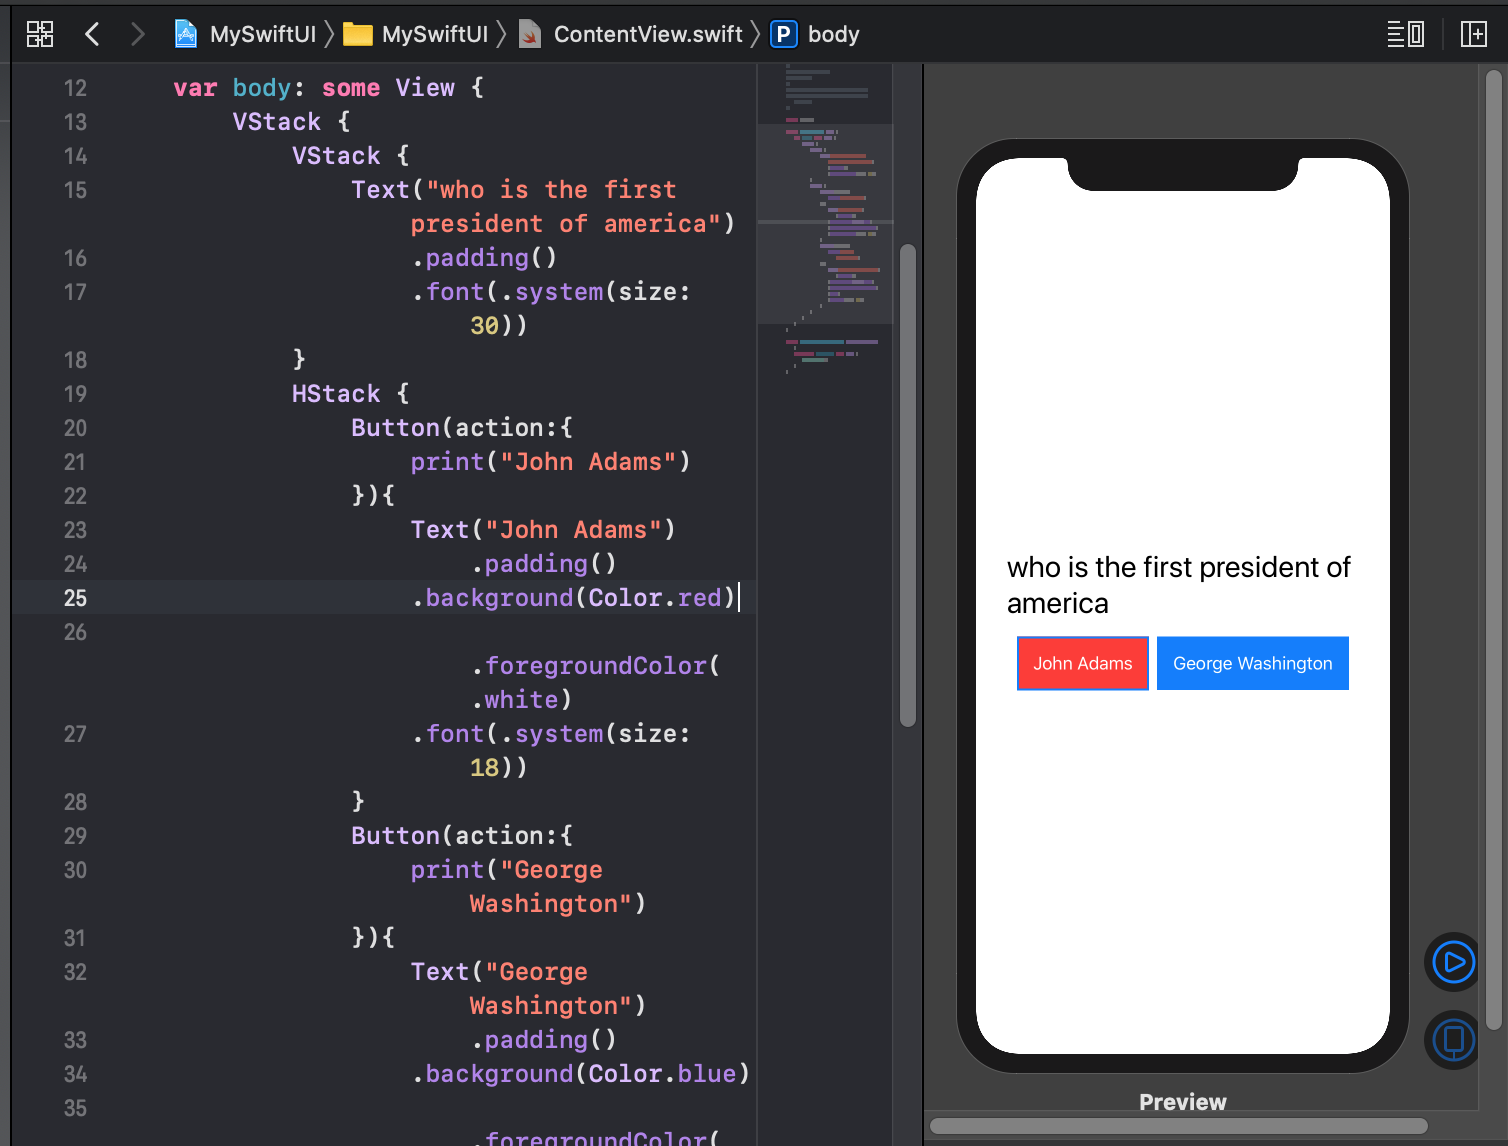
พิจารณาถ้าเรา Test หรือ Run แอปของเราถ้าเราคลิกจะมีข้อความ Debug Windows ตามโครงสร้าง:
Button(action:{
                    print("John Adams")
                }){
                    Text("John Adams")
                        .padding()
                    .background(Color.red)
                    .foregroundColor(.white)
                    .font(.system(size: 18))
                }
เมื่อ action: กดดูจะเกิดการ print ขึ้นมา ส่วนหลังคือ Style ของมันนั่นเอง
บทความนี้จะมา Basic เพียวๆ อย่างเดียวก็ยังไงๆ นะเพิ่ม Code หน่อยดีกว่ามี Basic ให้ไปนั่งเรียนนั่งจำจากผู้เชี่ยวชาญมาเยอะละ เรามา Implement Method กันเลย:
ประกาศ Global Variable ไว้ใน ContentView คือ:
@State var isAlert = false
@State var Clicked: Int = 0
แก้ action ของปุ่ม Button แรกเป็น:
Button(action:{
                self.isAlert = true
                self.Clicked = 1

                }){
                    Text("John Adams")
                        .padding()
                    .background(Color.red)
                    .foregroundColor(.white)
                    .font(.system(size: 18))
                }
ให้คลิกแล้วเปิดใช้งาน isAlert กำหนดเป็น true และ ตั้งค่าตัวแปร Clicked เป็น 1 คือเลือก Choice 1 นั่นแหละ
แก้ action ของปุ่ม Button ที่สองเป็น:
Button(action:{
                self.isAlert = true
                self.Clicked = 2

                }){
                    Text("George Washington")
                        .padding()
                    .background(Color.blue)
                    .foregroundColor(.white)
                    .font(
                    .system(size: 18))
                }
จะให้ Clicked เป็น 2 ถ้าไม่ตกสังคมก็จะรู้ว่า George Washington คือประธานาธิปดีคนแรกของ สหรัฐฯ ประเทศที่กำลังจะรบกับอิร่าน ในปี 2020
ไปสร้างฟังก์ชันใหม่ไว้ตรวจสอบคำตอบชื่อ CheckAnswer รับค่า int ตัวเดียว แล้ว return ว่าถูกหรือไม่ถูกเป็น String กลับมา
func CheckAnswer(id: Int)-> (String)
{
    var msg:String
    if(id == 2){
        msg = "Correct!!!"

    }else{
        msg = "Wrong, Looser!"
    }

    return (msg)
}
ไปเพิ่ม Alert มาใช้งานกันดีกว่า ไปเขียนใต้ Text ของโจทย์เรานั่นแหละ:
VStack {
                Text("who is the first president of america")
                    .padding()
                    .font(.system(size: 30))

                .alert(isPresented: $isAlert) {
                    Alert(title: Text("Your Answer"), message: Text("\(CheckAnswer(id: Clicked))"))
                }
            }
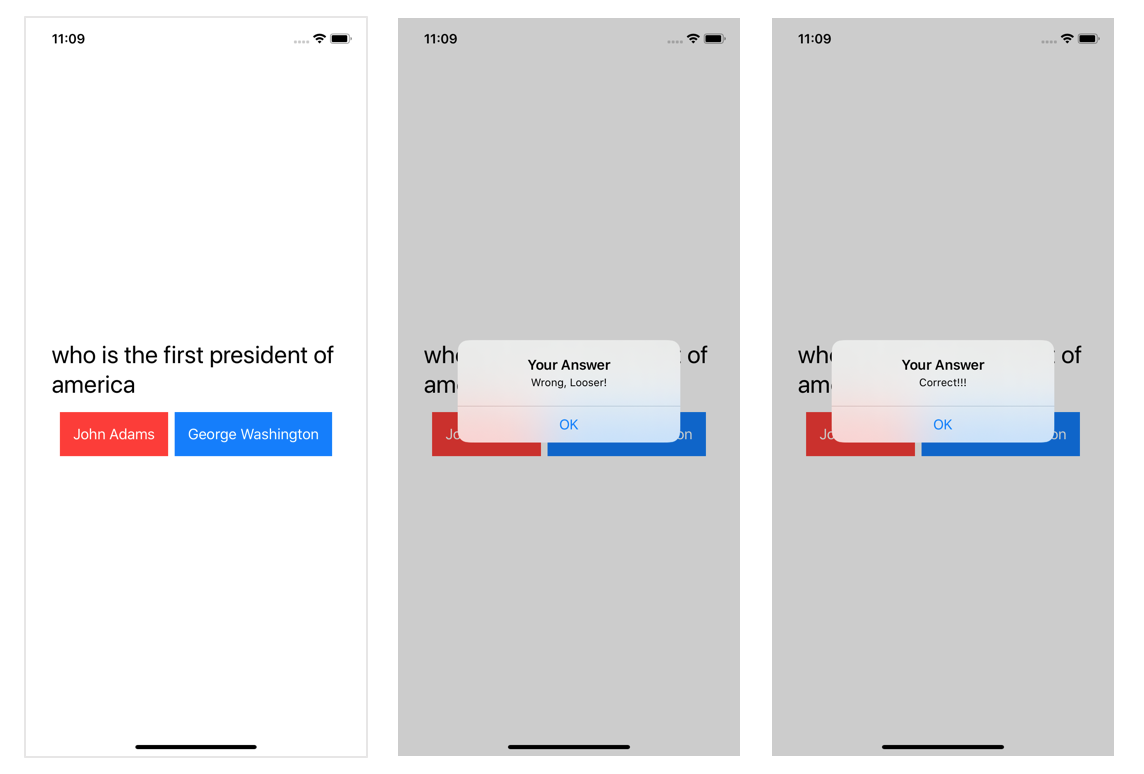
ตรง $isAlert ไว้เช็คว่าถ้า true ก็เด้ง Alert Box เลยส่วน Message อ่ะเรียก \(CheckAnswer(id:Clicked) ส่งค่า Clicked ไปยังฟังก์ชันที่เราเขียนไว้
ดังนั้นนี่คือภาพรวมของ ContentView.swift
//
//  ContentView.swift
//  MySwiftUI
//
//  Created by Banyapon on 5/12/2562 BE.
//  Copyright © 2563 DAYDEV. All rights reserved.
//

import SwiftUI

struct ContentView: View {
    @State var isAlert = false
    @State var Clicked: Int = 0

    var body: some View {
        VStack {
            VStack {
                Text("who is the first president of america")
                    .padding()
                    .font(.system(size: 30))

                .alert(isPresented: $isAlert) {
                    Alert(title: Text("Your Answer"), message: Text("\(CheckAnswer(id: Clicked))"))
                }
            }
            HStack {
                Button(action:{
                self.isAlert = true
                self.Clicked = 1

                }){
                    Text("John Adams")
                        .padding()
                    .background(Color.red)
                    .foregroundColor(.white)
                    .font(.system(size: 18))
                }

                Button(action:{
                self.isAlert = true
                self.Clicked = 2

                }){
                    Text("George Washington")
                        .padding()
                    .background(Color.blue)
                    .foregroundColor(.white)
                    .font(
                    .system(size: 18))
                }
            }
        }

    }
}

struct ContentView_Previews: PreviewProvider {
    static var previews: some View {
        ContentView()
    }
}

func CheckAnswer(id: Int)-> (String)
{
    var msg:String
    if(id == 2){
        msg = "Correct!!!"

    }else{
        msg = "Wrong, Looser!"
    }

    return (msg)
}
มาทดสอบกันหน่อยคลิกปุ่มแรก หรือปุ่มหลัง:
สรุปก็คือ SwiftUI จะ Friendly มากกับสายพัฒนา Dart, Flutter หรือ JS, TS มาก่อน จะบอกว่ามันได้แรงบันดาลใจมาก็ว่าได้เลย ลองไปแกะ Code กันดูนะจ๊ะ!




3 Comments