
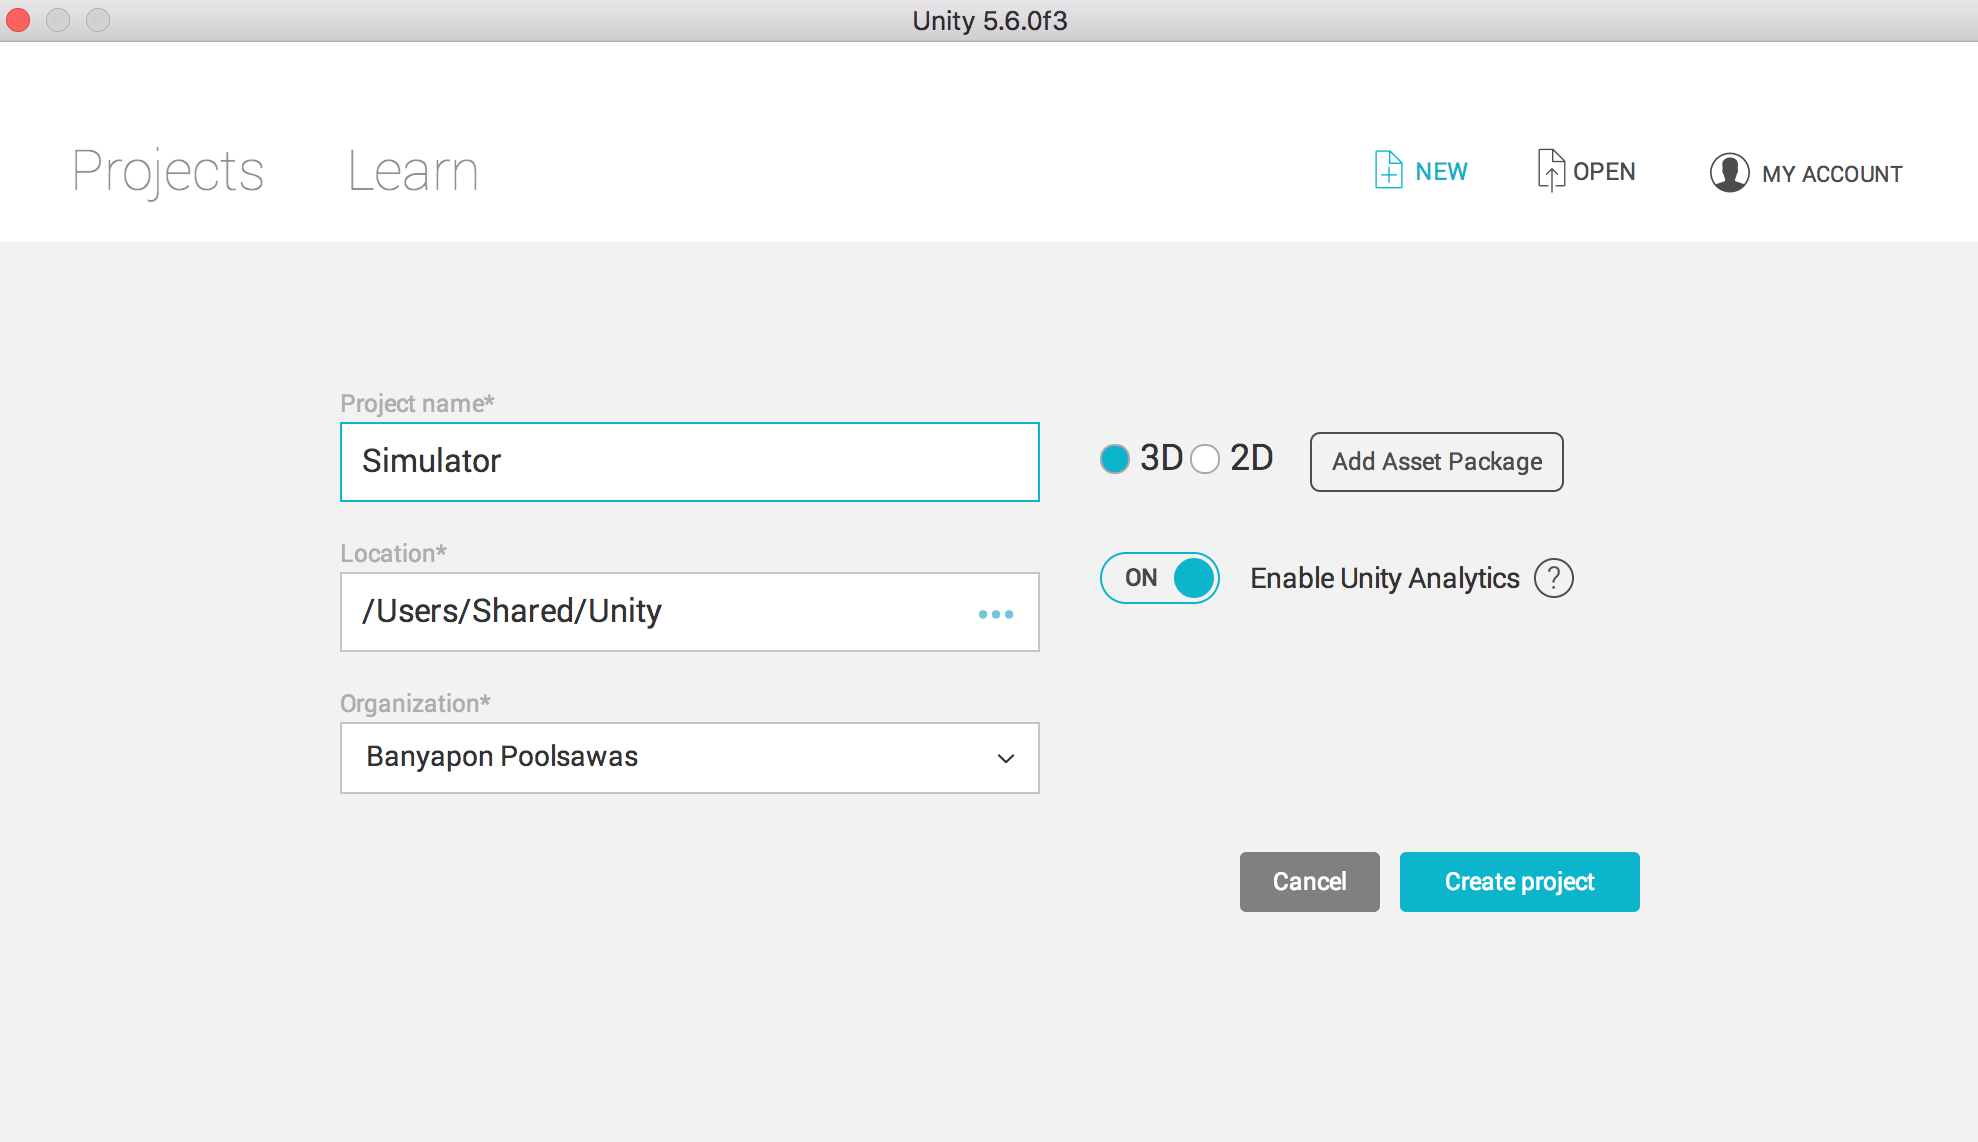
บทเรียนซีรีย์นี้จะเป็นการพัฒนาเกมแนว God Simulation Game หรือ Decission เกมด้วย Unity 5.6 และภาษาโปรแกรม C# เบื้องต้นครับ
ก่อนอื่นคือ เกม Design ของเราที่วางไว้ประกอบด้วย:
- ลูกโลกที่มีอุปสรรคมากมายปรากฏขึ้น เช่น น้ำท่วม ไฟไหม้ สงคราม ความแห้งแล้ง ฯลฯ
- ดวงอาทิตย์ และ พลังแห่งเทพที่คอย เลื่อน ฝนไปใส่ที่แห้งแล้ง เลื่อนน้ำไปใส่สงคราม หรือ ฝนไปใส่ไฟ และ แสงอาทิตย์ไปลดน้ำที่ท่วม
- การเล่นเป็นแนว touch และ rotate
แนว เกม Design ที่คิดได้มีแค่นี้

ดังนั้นเราต้องไปสร้าง โมเดลที่ชื่อว่า Planet ขึ้นมาครับ เพื่อจับวางลงใน Unity ของเรา
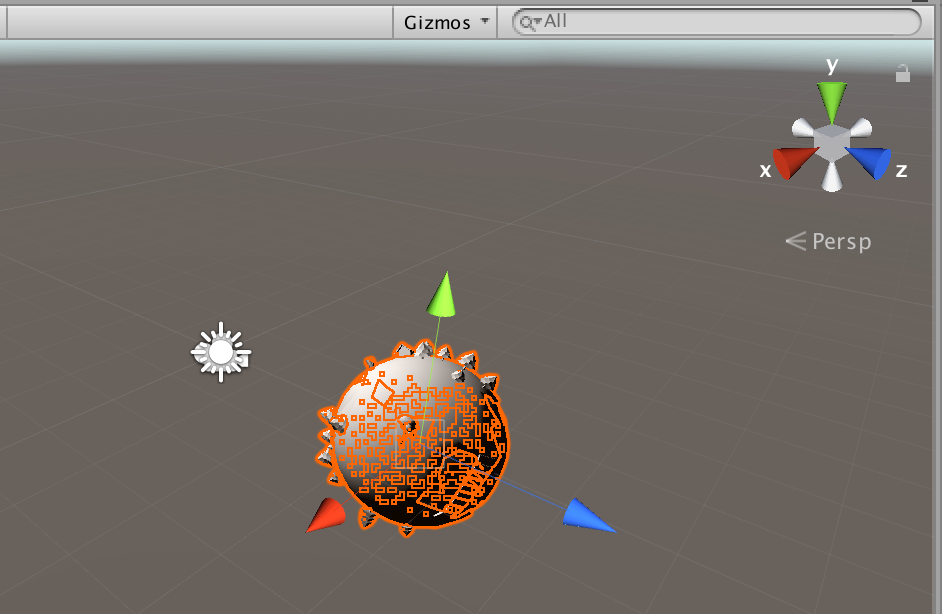
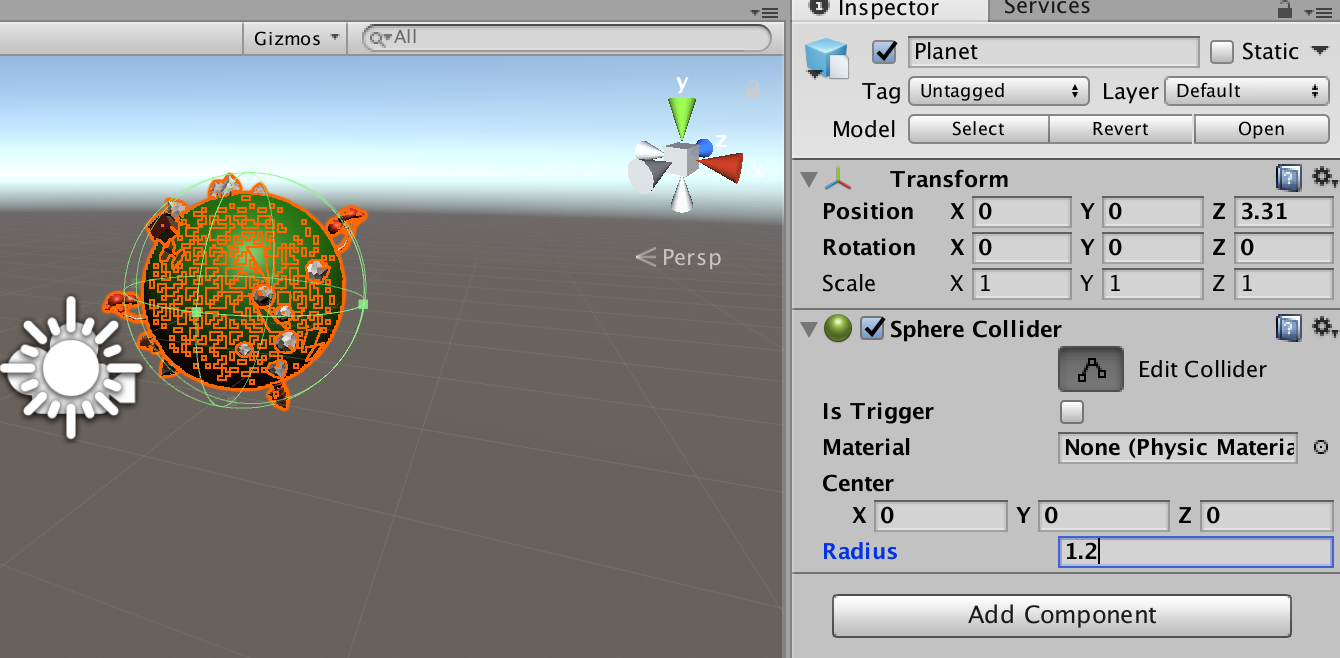
โดยโมเดลที่ทำการสร้างนั้นใส่ RigidBody ลงไปแต่ไม่ต้องมี Gravity ครับ ต่อจากนั้นสร้าง Sphere Collider ให้กับเจ้าโมเดล 3 มิติของเราซะ
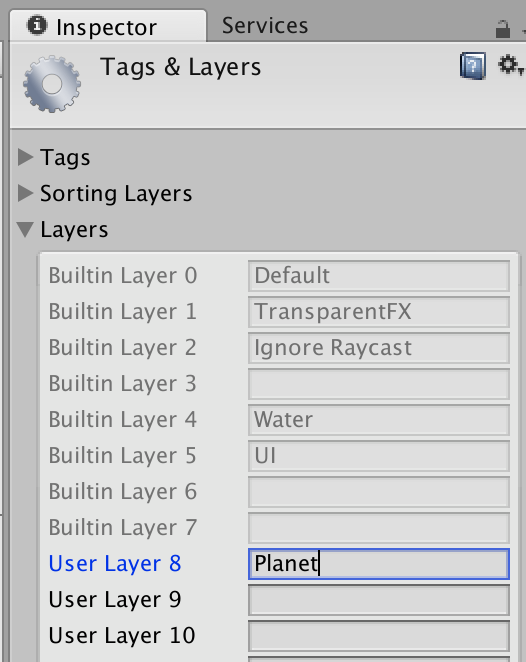
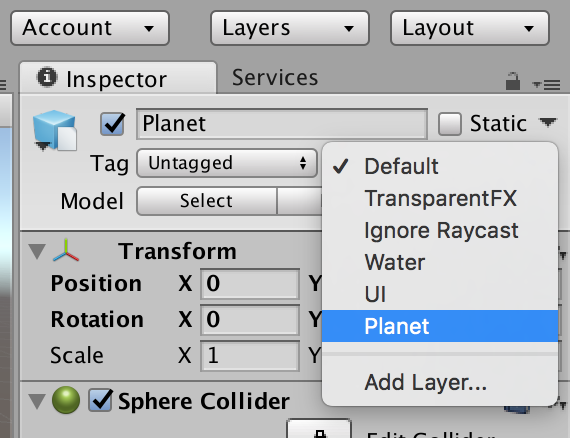
ให้ทำการสร้าง Layers ใหม่ขึ้นมาชื่อ “Planet” แล้วจับใส่ลงในตัวโมเดลลูกโลกดวงดาวของเราครับ หลังจากนั้นให้สร้าง C# ที่ชื่อว่า Planet.cs ขึ้นมาใส่คำสั่งต่อไปนี้ครับ เป็นการทำงานให้เราสามารถหมุนตัว GameObject ของเราได้โดยการคลิกแล้วลาก หรือ แตะแล้วลาก
using System.Collections;
using System.Collections.Generic;
using UnityEngine;

public class Planet : MonoBehaviour {

	public static Planet instance;
	public float RotationSpeed = 10f;
	public float LerpSpeed = 1f;
	private Vector3 _speed = new Vector3();
	private Vector3 _avgSpeed = new Vector3();
	private bool _dragging = false;
        public float MinEventInterval = 2;
	public float MaxEventInterval = 3;
	private bool _eventTriggable = true;
	public int LayerIndex {get; private set;}
	public LayerMask turnLayerMask;
	public AudioClip alarmSound;
	private Vector3 _preMousePos;

	void OnEnable()
	{
		instance = this;
		LayerIndex = this.gameObject.layer;
		Input.multiTouchEnabled = false;
	}

	IEnumerator TriggerEvent(float interval)
	{
		_eventTriggable = false;
		yield return new WaitForSeconds(interval);
		_eventTriggable = true;
	}
	void Update ()
	{
		if (Input.GetMouseButtonDown(0))
		{
			RaycastHit hit;
			Ray ray = Camera.main.ScreenPointToRay(Input.mousePosition);
			if (Physics.Raycast(ray, out hit, 200f, turnLayerMask)){
				_dragging = true;
			}
		}

		if (Input.GetMouseButton(0) && _dragging)
		{
			if (Application.platform == RuntimePlatform.Android)
				_speed = new Vector3(-Input.touches[0].deltaPosition.x, Input.touches[0].deltaPosition.y, 0);
			else
				_speed = new Vector3(-Input.GetAxis ("Mouse X"), Input.GetAxis("Mouse Y"), 0);
			  _avgSpeed = Vector3.Lerp(_avgSpeed, _speed, Time.deltaTime * 5);
		}else{
			if (_dragging)
			{
				_speed = _avgSpeed;
				_dragging = false;
			}
			float i = Time.deltaTime * LerpSpeed;
			_speed = Vector3.Lerp(_speed, Vector3.zero, i);
		}
		transform.Rotate( Vector3.up * _speed.x * RotationSpeed, Space.World );
		transform.Rotate( Vector3.right * _speed.y * RotationSpeed, Space.World );
	}
}
ใช้ RayCasting โดยเน้นที่แตะบนหน้าจอ
if (Input.GetMouseButtonDown(0)){
	RaycastHit hit;
	Ray ray = Camera.main.ScreenPointToRay(Input.mousePosition);
	if (Physics.Raycast(ray, out hit, 200f, turnLayerMask)){
		_dragging = true;
	}
}
โดยจะมีการเขียน Script สำหรับระบบปฏิบัติ Android ไว้ด้วยคือ
if (Input.GetMouseButton(0) && _dragging){
	if (Application.platform == RuntimePlatform.Android)
	_speed = new Vector3(-Input.touches[0].deltaPosition.x, Input.touches[0].deltaPosition.y, 0);
	else
	_speed = new Vector3(-Input.GetAxis ("Mouse X"), Input.GetAxis("Mouse Y"), 0);
	_avgSpeed = Vector3.Lerp(_avgSpeed, _speed, Time.deltaTime * 5);
}else{
	if (_dragging){
	  _speed = _avgSpeed;
	  _dragging = false;
	}
	float i = Time.deltaTime * LerpSpeed;
	_speed = Vector3.Lerp(_speed, Vector3.zero, i);
}
เราจะปิดระบบ MultiTouch ที่
void OnEnable()
	{
		instance = this;
		LayerIndex = this.gameObject.layer;
		Input.multiTouchEnabled = false;
	}
ส่วนคำสั่งในการ Rotate ไปมาคือ
transform.Rotate( Vector3.up * _speed.x * RotationSpeed, Space.World );
		transform.Rotate( Vector3.right * _speed.y * RotationSpeed, Space.World );
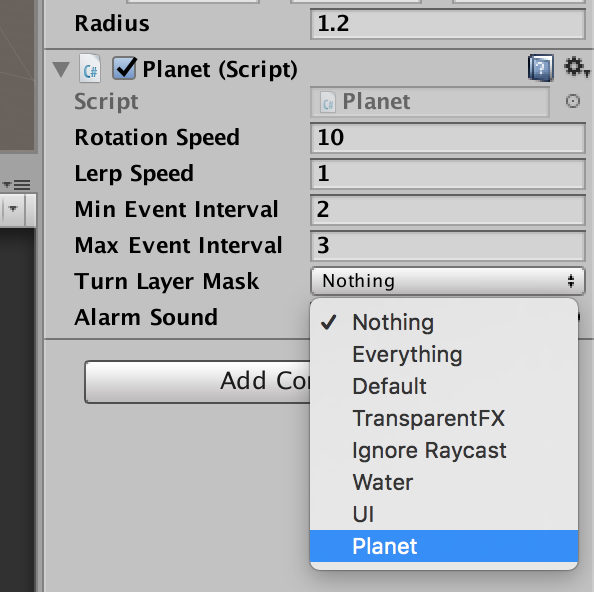
เมื่อใส่ Code เสร็จแล้วให้ทำการตั้งค่า Turn Layer Mask ที่กำหนดจาก Nothing เป็น Layer ที่ชื่อว่า Planet ที่สร้างขึ้น
ตั้งค่า Camera ของเราให้ Tags เป็น MainCamera เพื่อทำงานร่วมกับ RayCasting

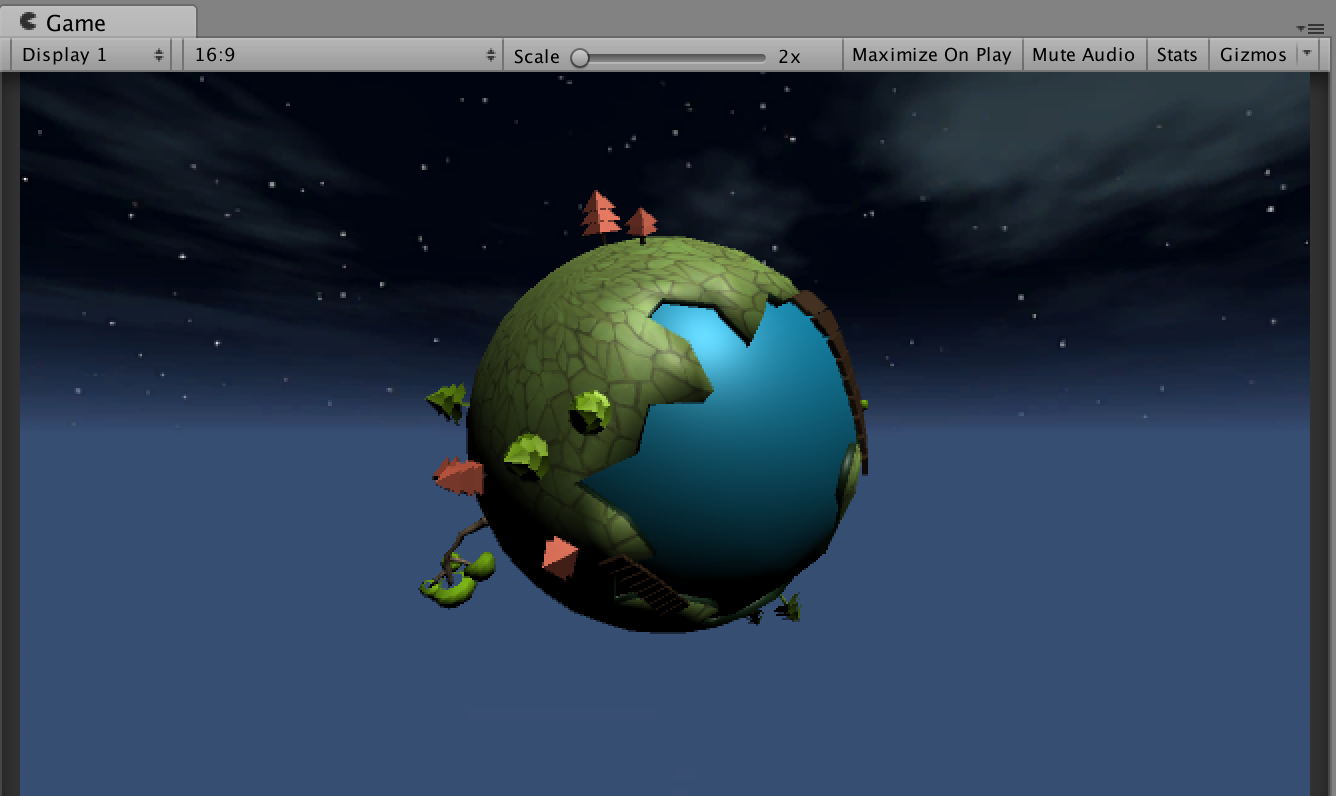
ทำการ Run ตัวเกมเพื่อทดสอบโดยการคลิกที่ Planet แล้วเลื่อนไปมาดูครับ

ตัวอย่างอยู่ใน File นามสกุล Gif ข้างล่างหลังจากตกแต่งแล้ว

ติดตามการพัฒนาในบทเรียนซีรีย์นี้ต่อกันนะครับ จะทยอยอัพเพื่อความต่อเนื่อง
ตอนนี้ก็มีตอนที่สองต่อแล้วนะครับอ่านได้เลย:


3 Comments