การเรียกใช้คำสั่ง Collision Detect ด้วย Cocos2D ให้ตัวละครในเกมยิงกระสุน ไปโดนศัตรูให้หายไปได้ผ่าน XCode สำหรับ iOS Developer มือใหม่ที่อยากพัฒนาเกมจากบทความก่อนหน้านี้ “iOS Game Developer Tutorial: วางภาพ Spriteตัวละครลงในเกมด้วย Cocos2D” ที่มีการวางตัวละครลงไปในเกมแล้ว และมีศัตรูปรากฏวิ่งไปมาแล้วต่อไปเราต้องสร้างกระสุนของตัวละครให้ยิงออกไปโดนศัตรู เริ่มต้นสร้างกระสุน และวิธีในการยิงของเรา ให้ไปเพิ่มคำสั่งเล็กน้อยที่ ฟังก์ชัน init() ครับ ก่อนคำสั่งประกาศขนาดหน้าจอของเรา
self.isTouchEnabled = YES;
CGSize winSize = [[CCDirector sharedDirector] winSize];
หาภาพกราฟิก สำหรับสร้างเป็นลูกกระสุนของเรา ตั้งชื่อว่า “Bullet.png” ขนาดความก้าว และ ความยาว 40×40 pixels
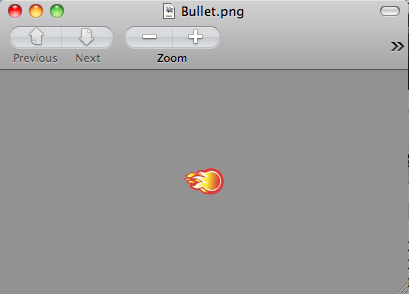
พร้อมทั้งใส่คำสั่งต่อไปนี้ลงไปในไฟล์ PlayScene.m เป็นการเรียกคำสั่งเดียวกับเมนูคือเมื่อมีการแตะแล้วปล่อยที่พิกัดใดๆ กระสุนจะวิ่งไปยังพิกัดดังกล่าว
- (void)ccTouchesEnded:(NSSet *)touches withEvent:(UIEvent *)event {

    // Choose one of the touches to work with
    UITouch *touch = [touches anyObject];
    CGPoint location = [touch locationInView:[touch view]];
    location = [[CCDirector sharedDirector] convertToGL:location];

    // Set up initial location of projectile
    CGSize winSize = [[CCDirector sharedDirector] winSize];
    CCSprite *projectile = [CCSprite spriteWithFile:@"Bullet.png"
    rect:CGRectMake(0, 0, 40, 40)];
    projectile.position = ccp(20, winSize.height/2);

    // Determine offset of location to projectile
    int offX = location.x - projectile.position.x;
    int offY = location.y - projectile.position.y;

    // Bail out if we are shooting down or backwards
    if (offX <= 0) return;

    [self addChild:projectile];

    int realX = winSize.width + (projectile.contentSize.width/2);
    float ratio = (float) offY / (float) offX;
    int realY = (realX * ratio) + projectile.position.y;
    CGPoint realDest = ccp(realX, realY);

    // Determine the length of how far we're shooting
    int offRealX = realX - projectile.position.x;
    int offRealY = realY - projectile.position.y;
    float length = sqrtf((offRealX*offRealX)+(offRealY*offRealY));
    float velocity = 480/1; // 480pixels/1sec
    float realMoveDuration = length/velocity;

    // Move projectile to actual endpoint
    [projectile runAction:[CCSequence actions:
    [CCMoveTo actionWithDuration:realMoveDuration position:realDest],
    [CCCallFuncN actionWithTarget:self selector:@selector(spriteMoveFinished:)],
    nil]];

}
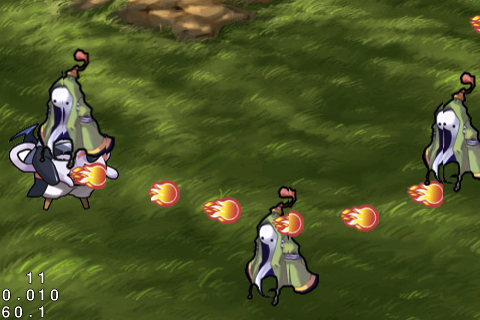
ทดลอง "Run” ตัวแอพพลิเคชันดู แล้วทำการ คลิกไปที่ บริเวณใดๆ ของหน้าจอจะพบว่าตัวละครจะยิงกระสุนไป ยังบริเวณที่เราคลิก หรือทำการแตะ
วิธีการตรวจสอบการชนกันของวัตถุ หรือ Collision Detect
Collision Detect เป็นหลักการเดียวที่ทุกเกม ไม่ว่าจะอยู่บนแพลตฟอร์มใดๆ จะต้องใช้งานเป็นสากลเพราะเป็นการตรวจสอบว่าวัตถุชิ้นหนึ่งเมื่อซ้อนทับหรือชนกับอีกชิ้นหนึ่งแล้วจะเกิดเงื่อนไขอะไรขึ้นซึ่งในเกมของเราจะใช้อยู่ 2 เงื่อนไขหลักๆ คือ
- กระสุนโดนศัตรู ศัตรก็จะตาย
- ศัตรูโดนเรา เราก็ตาย “GameOver”
ให้ไปที่ไฟล์ PlayScene.h ครับทำการประกาศ ตัวแปลชนิด NSMutableArray ลงไปดังรูปแบบข้างล่าง
#import
#import "cocos2d.h"
@interface PlayScene : CCLayer {
    NSMutableArray *_targets;
    NSMutableArray *_projectiles;
}
ต่อมาให้ไปเพิ่มคำสั่งในไฟล์ PlayScene.m ครับในฟังก์ชัน init() บรรทัดต่อจาก คำสั่ง self.isTouchEnabled = YES; ไปเลยครับ
-(id) init
{
 if( (self=[super init] )) {

 self.isTouchEnabled = YES;
 _targets = [[NSMutableArray alloc] init];
 _projectiles = [[NSMutableArray alloc] init];
ทำการคืนหน่วยความจำของกระสุนปืน และศัตรูของเราลงไปในฟังก์ชัน dealloc() ครับ
-(void)dealloc
{
    [_targets release];
    _targets = nil;
    [_projectiles release];
    _projectiles = nil;
	[super dealloc];
}
เพิ่มคำสั่งลงไปในฟังก์ชัน addTarget() ในตำแหน่งบรรทัดล่างสุดก่อนปิดฟังก์ชัน
[target runAction:[CCSequence actions:actionMove, actionMoveDone, nil]];
// Add to targets array
target.tag = 1;
[_targets addObject:target];
ให้เข้าไปเพิ่มที่ฟังก์ชัน ccTouchesEnded เช่นกันในตำแหน่งก่อนปิดฟังก์ชันบรรทัดสุดท้าย
// Add to projectiles array
projectile.tag = 2;
[_projectiles addObject:projectile];
ต่อมาแก้ไข ฟังก์ชัน spriteMoveFinished จากเดิมคือ
-(void)spriteMoveFinished:(id)sender {
    CCSprite *sprite = (CCSprite *)sender;
    [self removeChild:sprite cleanup:YES];
}
ให้กลายเป็น
-(void)spriteMoveFinished:(id)sender {
    CCSprite *sprite = (CCSprite *)sender;
    [self removeChild:sprite cleanup:YES];

    if (sprite.tag == 1) { // target
        [_targets removeObject:sprite];
    } else if (sprite.tag == 2) { // projectile
        [_projectiles removeObject:sprite];
    }
}
ทำการ "Run” ตรวจสอบดูอีกครั้งว่ามี Error ปรากฏไหม เพราะว่าเรามากันไกลมากแล้ว, ต่อไปจะเป็นการตรวจสอบเงื่อนไขของการ ชนกันของวัตถุ ที่สำคัญมาก แทรกคำสั่งนี้ลงไปในไฟล์ PlayScene.m เลยครับ
- (void)update:(ccTime)dt {

    NSMutableArray *projectilesToDelete = [[NSMutableArray alloc] init];
    for (CCSprite *projectile in _projectiles) {
        CGRect projectileRect = CGRectMake(
                projectile.position.x - (projectile.contentSize.width/2),
                projectile.position.y - (projectile.contentSize.height/2),
                projectile.contentSize.width,
                projectile.contentSize.height);

        NSMutableArray *targetsToDelete = [[NSMutableArray alloc] init];
        for (CCSprite *target in _targets) {
            CGRect targetRect = CGRectMake(
                target.position.x - (target.contentSize.width/2),
                target.position.y - (target.contentSize.height/2),
                target.contentSize.width,
                target.contentSize.height);

            if (CGRectIntersectsRect(projectileRect, targetRect)) {
                [targetsToDelete addObject:target];
            }
        }

        for (CCSprite *target in targetsToDelete) {
            [_targets removeObject:target];
            [self removeChild:target cleanup:YES];
        }

        if (targetsToDelete.count > 0) {
            [projectilesToDelete addObject:projectile];
        }
        [targetsToDelete release];
    }

    for (CCSprite *projectile in projectilesToDelete) {
        [_projectiles removeObject:projectile];
        [self removeChild:projectile cleanup:YES];
    }
    [projectilesToDelete release];
}
คำสั่งข้างต้นเป็นการเคลียร์ทุกสิ่งที่มีการ ชนกันโดยจะยึดตามขนาดของความกว้าง และความยาวของวัตถุที่ปรากฏในเกมเป็นหลักเพื่อตรวจสอบการชนกัน
ต่อมาให้แทรกคำสั่งต่อไปนี้ลงไปในฟังก์ชัน init() ต่อจากคำสั่ง Interval ก่อนปิดฟังก์ชัน
[self addChild:bgGame];
[self addChild:player];
[self schedule:@selector(gameLogic:) interval:1.0];
[self schedule:@selector(update:)];
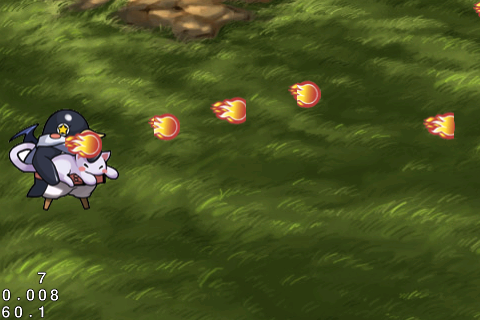
ทำการ "Run” แอพพลิเคชัน แล้วลอง ยิงกระสุนไปยังศัตรูของเราดูจะพบว่า ศัตรูของเราได้หายไปแล้วเมื่อโดนกระสุน
ในบทเรียนต่อไปจะเป็นพาไปรู้จักกับการตรวจสอบการชนกันเมื่อศัตรูเลื่อนมาโดนเราแล้วแสดงผลหน้าจอ Game Over และองคฺประกอบเพิ่มเติมต่อไปนี้
- การใส่ไฟล์เสียงลงไป (Audio)
- การทำฉากหลังเลื่อนได้ (Paralax BackGround)
- การหยุดเกม (Pause)
- การเปลี่ยนหน้า (Winner, Game Over)

